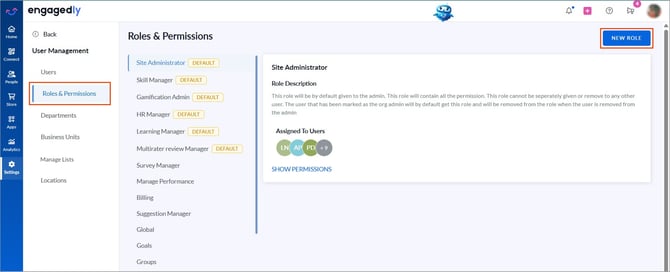
Engagedly offers various roles and permissions across all modules. Roles and Permissions allow admins to control employee access across Engagedly. You can create roles, define permissions, and assign them to employees to ensure the right level of access to features and data.
Navigate to Settings > User Management > Roles and Permissions.
Add a new role
Engagedly provides default roles and also allows creating custom roles tailored to your organization’s needs.
- Click NEW ROLE at the top right.
2. Enter the role name and description.
3. Select the required permissions.
4. Click ADD to save.
After creating the role, assign it to employees.
Manage a role
After creating roles, update or delete them as required.
- Select a role from the left panel.
- Click the Overflow
 Menu on the right.
 - Select Edit to update role details or permissions, or Delete to remove the role.
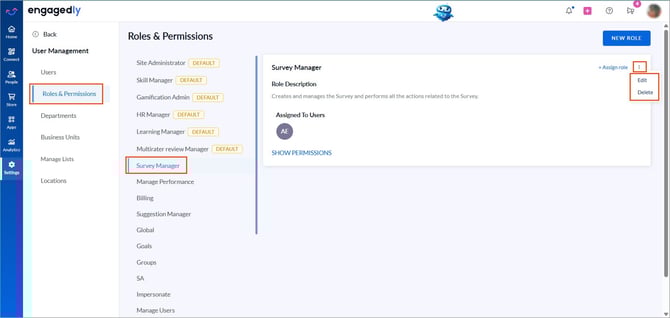
📒Note: You cannot edit or delete default roles, but you can assign them to employees.
Assign a role
Assign new or existing roles to employees based on their responsibilities.
- Select a role from the left panel.
- Click + Assign role on the right.
- Search and select employees.
- Click SAVE to confirm the assignment.
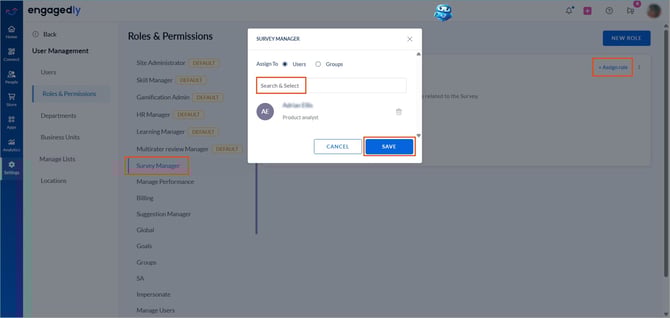
To unassign a role: Click the Delete ![]() icon, then click SAVE.
icon, then click SAVE.
Contact our support team for detailed documentation on each role and its permissions.