Integrate Microsoft Entra (Azure AD) with Engagedly
Table of contents
1. Introduction
Microsoft Entra is a comprehensive solution for protecting organization identities, managing directories, managing workloads, remediating tasks, and securing access to internet-based applications and resources. Microsoft Entra is the new name for Azure Active Directory (AD).
The Microsoft Entra and Engagedly integration allows employees to use their Microsoft Entra credentials to access Engagedly, providing a seamless and secure single sign-on (SSO) experience. IT teams can efficiently manage user access and permissions, ensuring that only authorized users can access sensitive data. By centralizing identity management, organizations can improve security, reduce administrative overhead, and offer a smoother user experience across platforms.
2. Integration
Admins can seamlessly integrate Microsoft Entra with Engagedly, which enhances security and simplifies identity management for organizations.
Navigate to Settings > Integrations.
- In the SSO field, click SAML Single Sign On.
- In the SAML SSO window, click ADD at the top right.
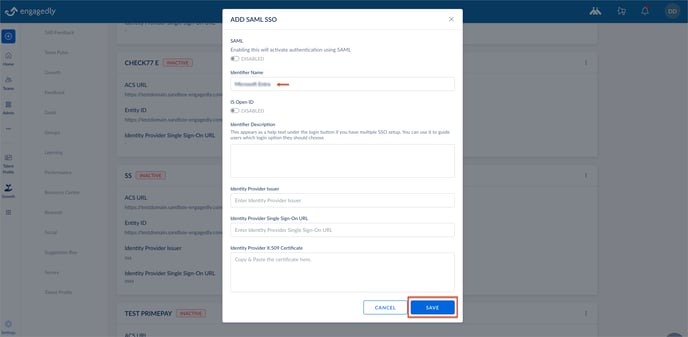
- In the ADD SAML SSO pop-up, type the identifier name as required, and click SAVE.
Once saved, the system will generate the ACS URL and Entity ID.
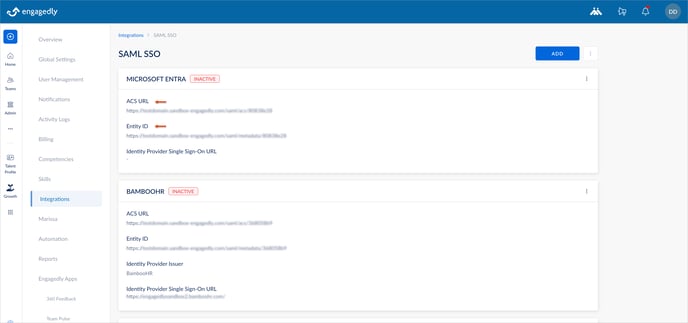
Note: Use the ACS URL and Entity ID in step 11 to configure basic SAML.
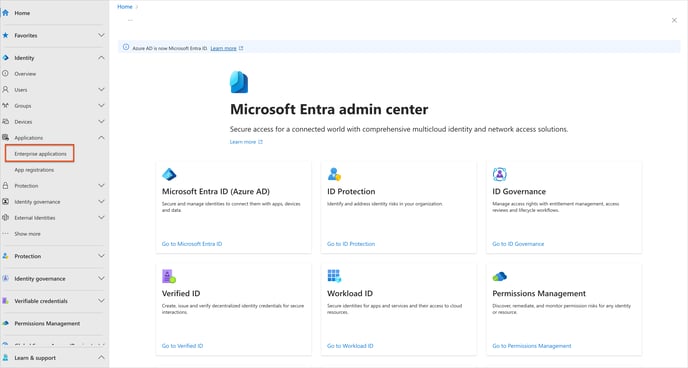
4. Log in to the Microsoft Entra portal as an admin, and on the home page, select Enterprise applications on the left pane.
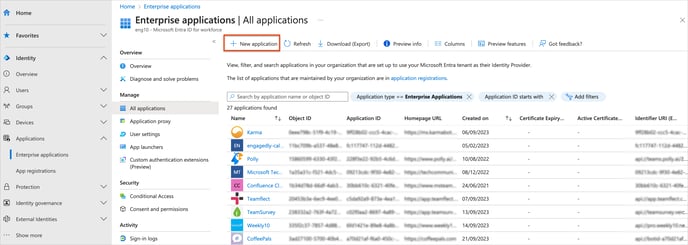
5. In the Enterprise Applications, click + New application to add your application.
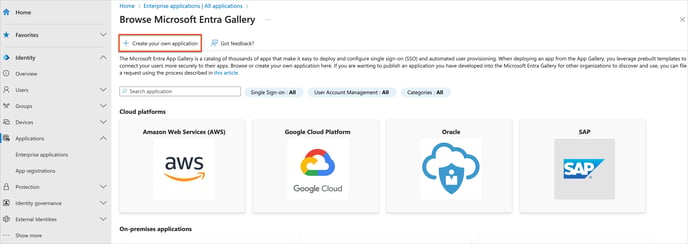
6. In the Browse Microsoft Entra Gallery window, click Create your own application.
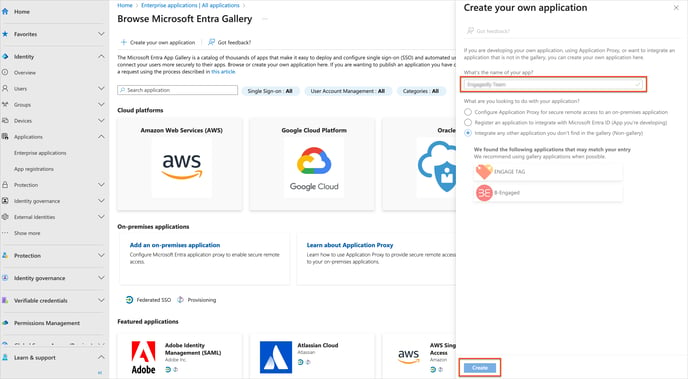
7. Type a name to name your app, select Integrate any other application you don't find in the gallery (Non-gallery), and click Create.
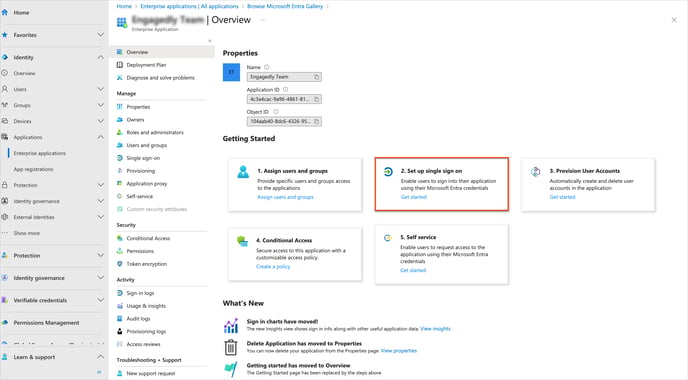
8. In the Overview window, select Set up single sign on.
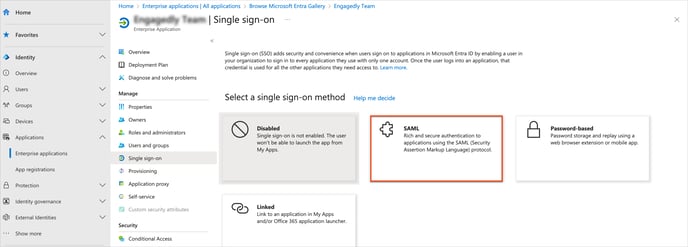
9. Select SAML.
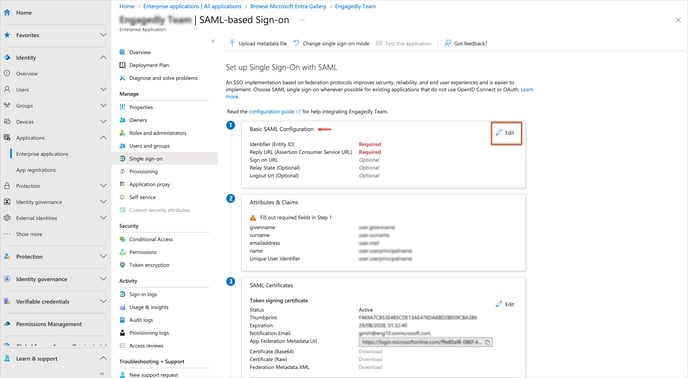
10. In the Basic SAML Configuration field, click Edit.
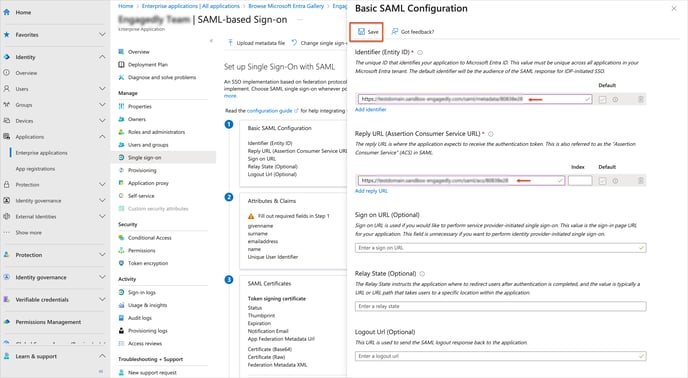
11. Enter the Entity ID and ACS URL generated in Engagedly (step 3) into their respective fields and click Save to configure them.
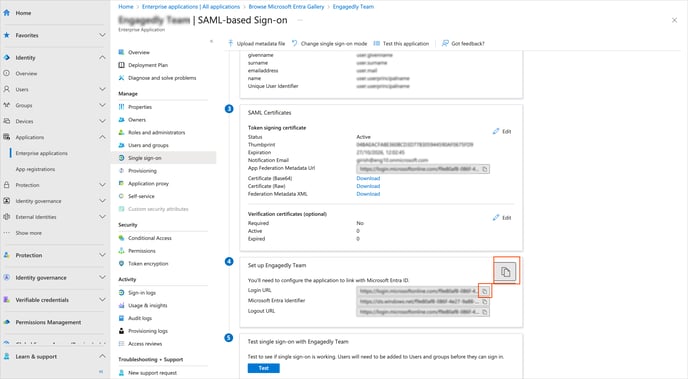
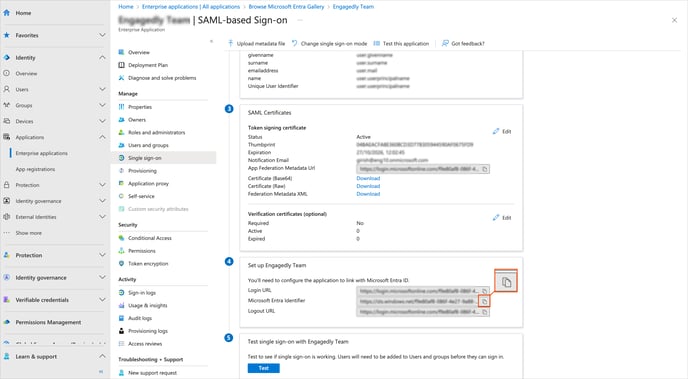
12. Scroll down, and in the Set up field, click the Copy ![]() Icon to copy the Login URL.
Icon to copy the Login URL.
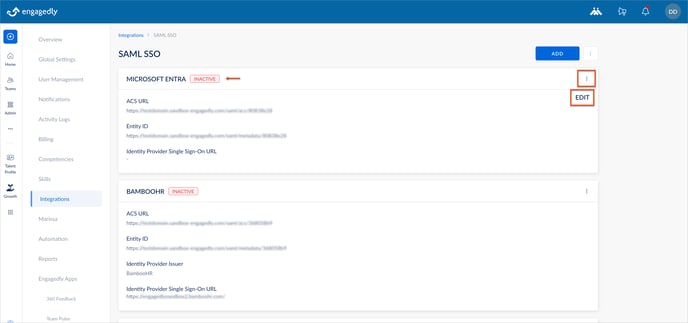
13. On the Engagedly portal, click the Overflow ![]() Menu in the MICROSOFT ENTRA field, and click Edit.
Menu in the MICROSOFT ENTRA field, and click Edit.
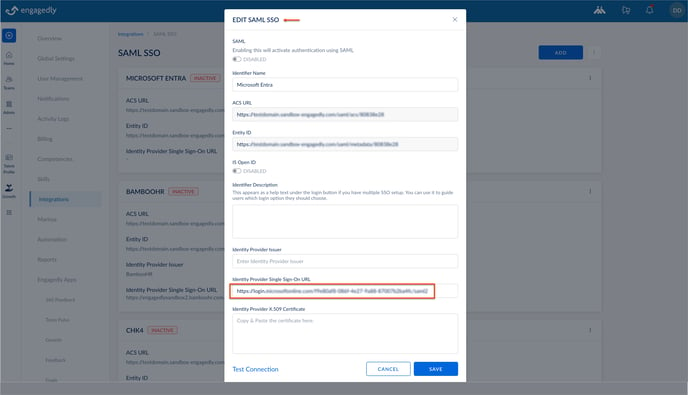
14. In the EDIT SAML SSO pop-up, paste the Login URL in the Identity Provider Single Sign-On URL field.
15. On the Microsoft Entra portal, click the Copy ![]() Icon to copy the Microsoft Entra Identifier.
Icon to copy the Microsoft Entra Identifier.
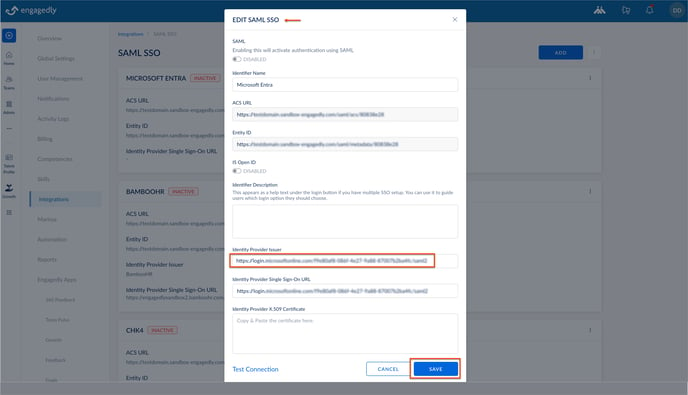
16. On the Engagedly portal, in the EDIT SAML SSO pop-up, paste the Microsoft Entra Identifier in the Identity Provider Issuer field.
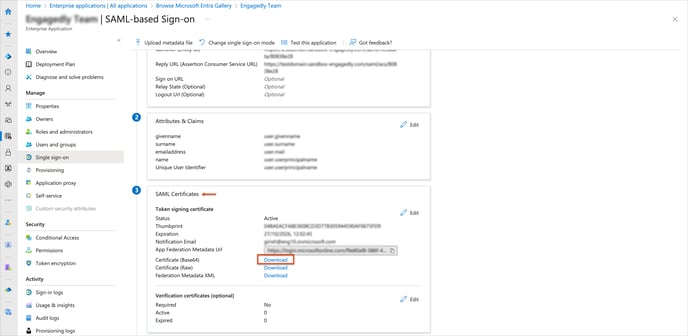
17. On the Microsoft Entra portal, scroll down to the SAML Certificates section and click Download in the Certificate (Base64) field to download the certificate.
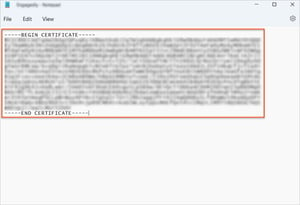
18. Open the downloaded certificate in a text editor, copy the entire content, including the lines ----- BEGIN CERTIFICATE-----and----- END CERTIFICATE-----.
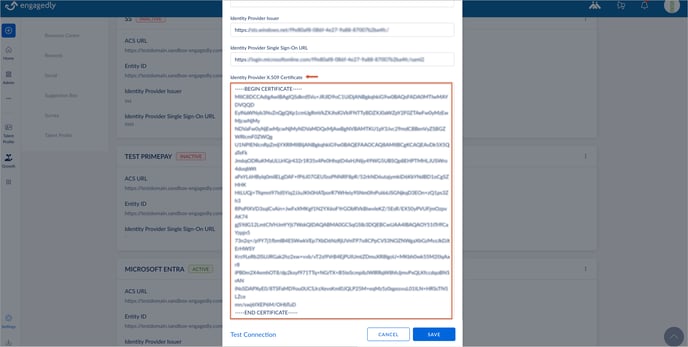
19. On the Engagedly portal, in the EDIT SAML SSO pop-up, paste the certificate content into the Identity Provider X.509 Certificate field.
20. In the EDIT SAML SSO pop-up, toggle the button to enable SAML, and click SAVE.
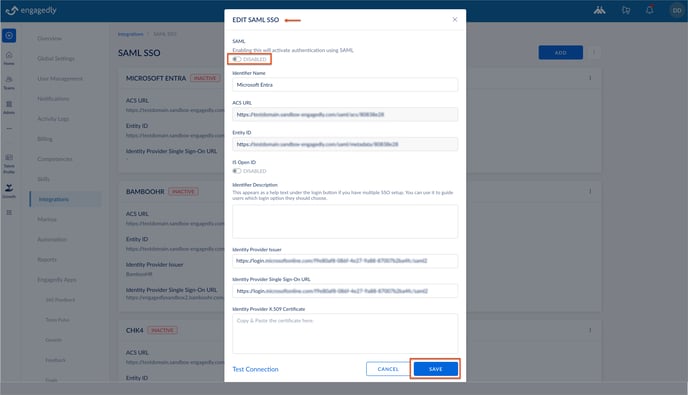
Microsoft Entra is successfully integrated with Engagedly for single sign-on (SSO).
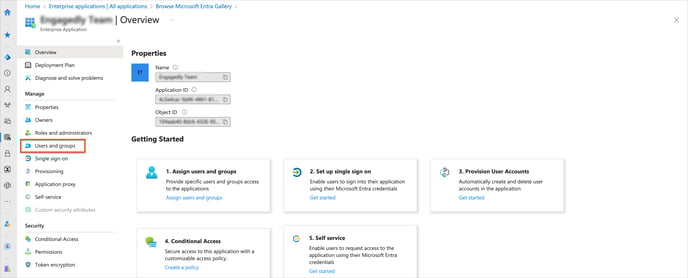
21. On the Microsoft Entra portal, in the Overview window, select Users and groups on the left pane.
22. In the Users and Groups window, click + Add user/group.

23. Select users or groups available on Microsoft Entra and click Select.
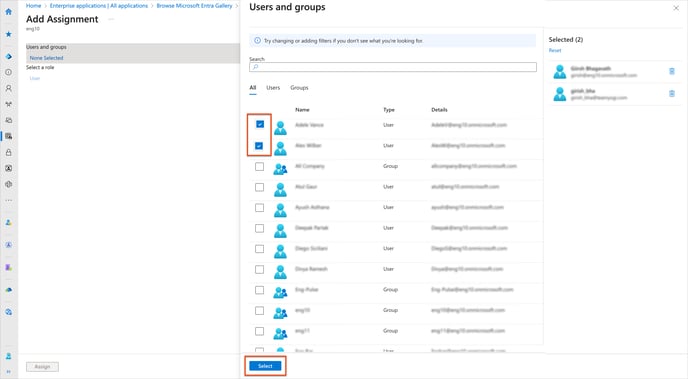
Microsoft Entra users now exist on the Engagedly portal with their same email ID to access single sign-on (SSO) on Engagedly.