- Help Center
- LXP (Learning)
- Admin (Previous Version)
Learning Automation
Workflow automation for learning enables admins to assign courses automatically to employees.
Assign Courses to Users
Follow the steps below to create a learning automation
Step 1: Navigate to Admin > Automation
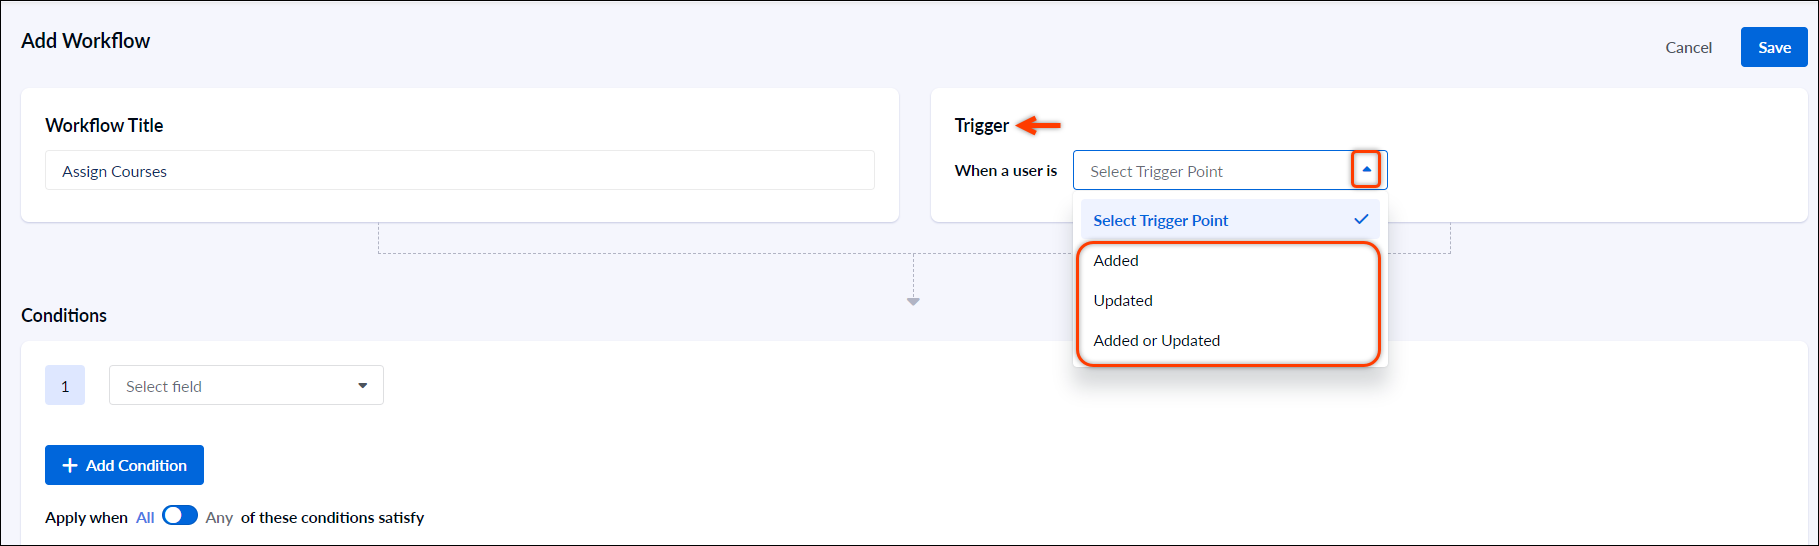
Step 2: Click Add Workflow to create a workflow.
Step 3: Type your workflow title.![2.png](https://help.engagedly.com/hubfs/Knowledge%20Base%20Import/15327487805209-1.png)
![2.png](https://help.engagedly.com/hubfs/Knowledge%20Base%20Import/15327487805209-1.png)
Step 4: Select the trigger point.
You can select the following trigger points:
-
When a user is “added”
-
When a user is “updated”
-
When a user is “added or updated”
Step 5: From "Conditions," select the field and the operator. You can assign courses to the users based on the date of hire, department, business unit, job title, manager, and tenure.![Workflow2.png](https://help.engagedly.com/hubfs/Knowledge%20Base%20Import/15327964677273-1.png)
![Workflow2.png](https://help.engagedly.com/hubfs/Knowledge%20Base%20Import/15327964677273-1.png)
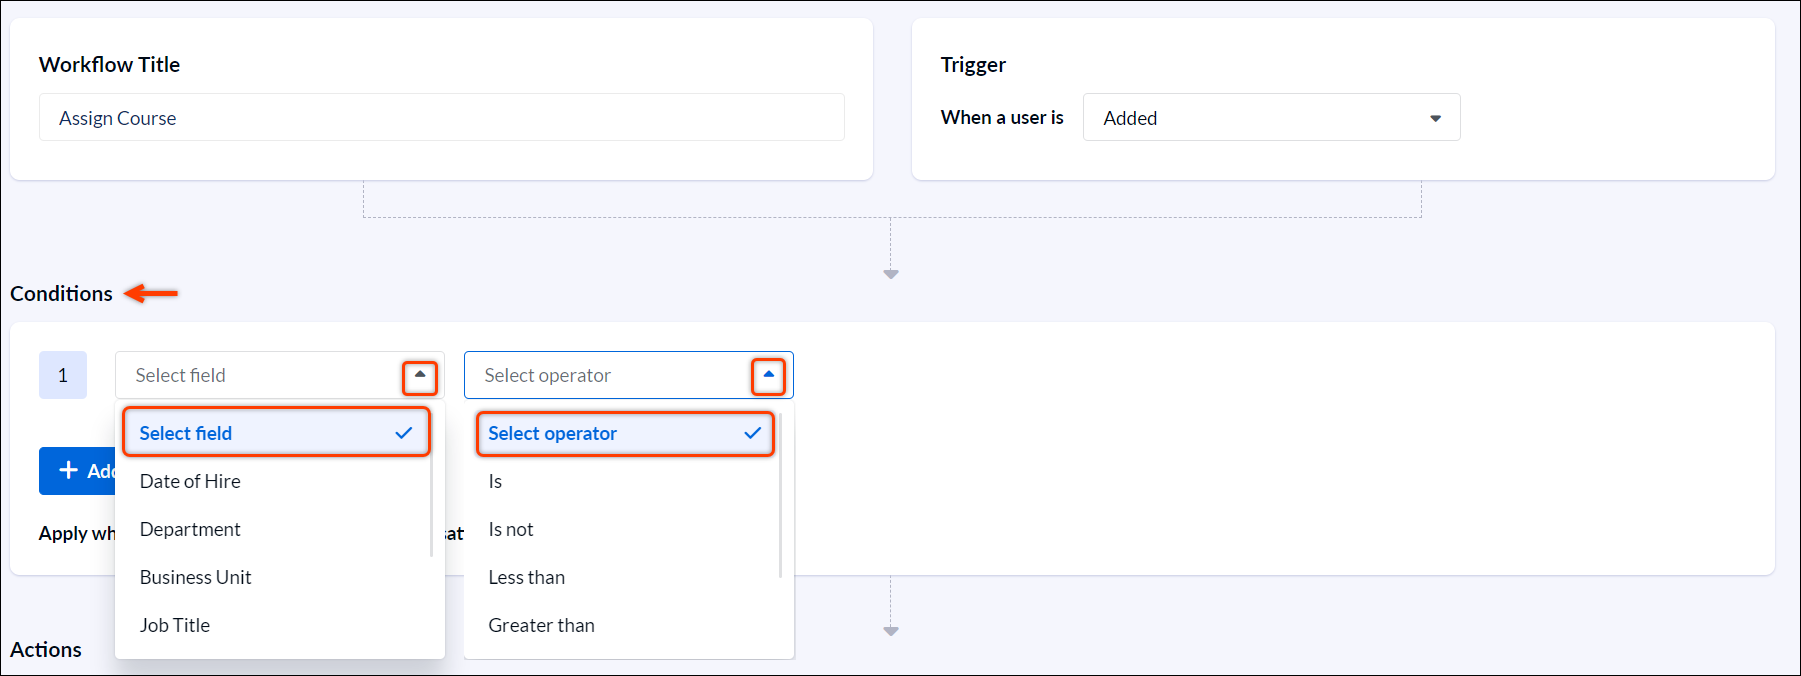
Step 6: In this scenario, select the field as “Date of Hire,” the operator as “Is,” and select the hire date.![5.png](https://help.engagedly.com/hubfs/Knowledge%20Base%20Import/15327488024089-1.png)
![5.png](https://help.engagedly.com/hubfs/Knowledge%20Base%20Import/15327488024089-1.png)
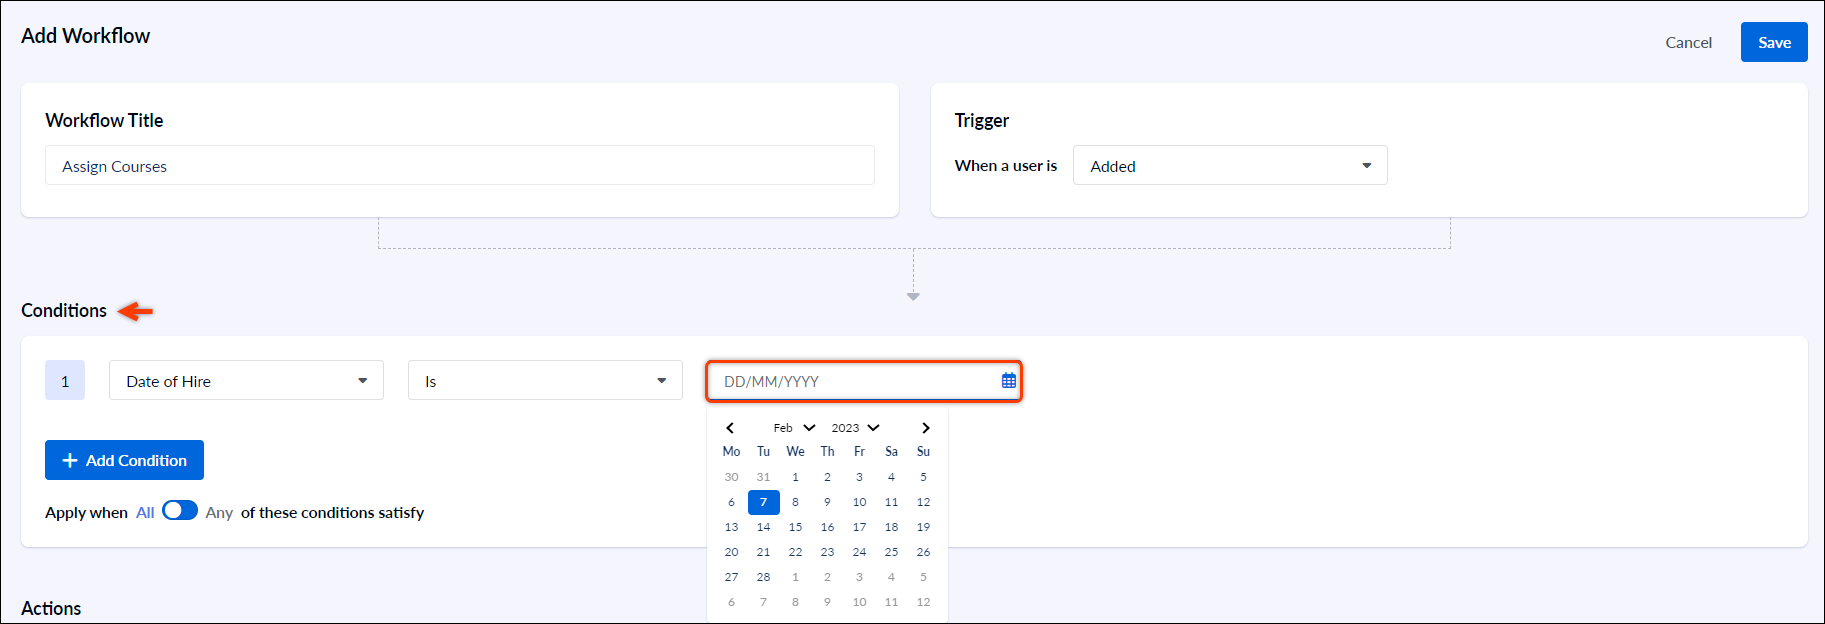
Step 7: Click +Add Condition to add multiple conditions.![6.png](https://help.engagedly.com/hubfs/Knowledge%20Base%20Import/15327488021017-1.png)
![6.png](https://help.engagedly.com/hubfs/Knowledge%20Base%20Import/15327488021017-1.png)
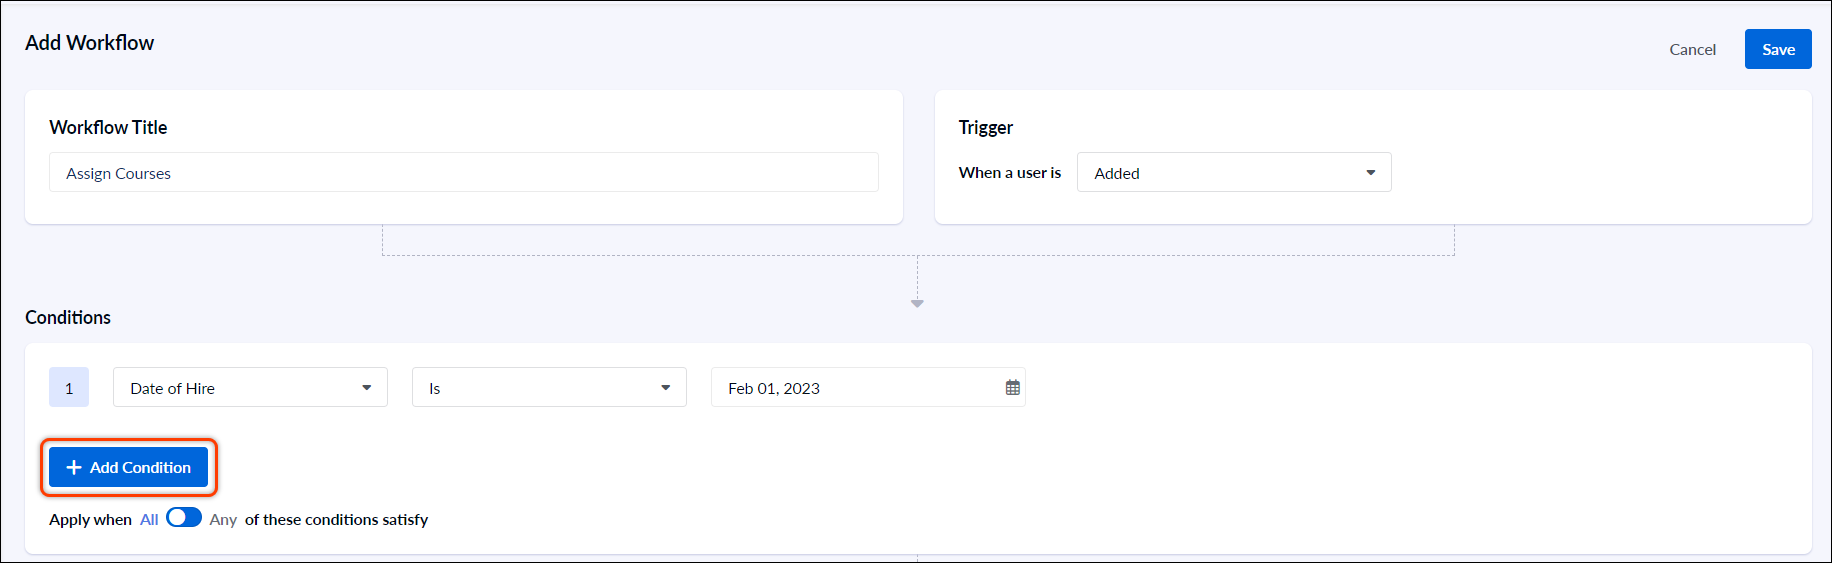
Step 8: From the “Actions” drop-down, select Assign Course.![7.png](https://help.engagedly.com/hubfs/Knowledge%20Base%20Import/15327488146201-1.png)
![7.png](https://help.engagedly.com/hubfs/Knowledge%20Base%20Import/15327488146201-1.png)
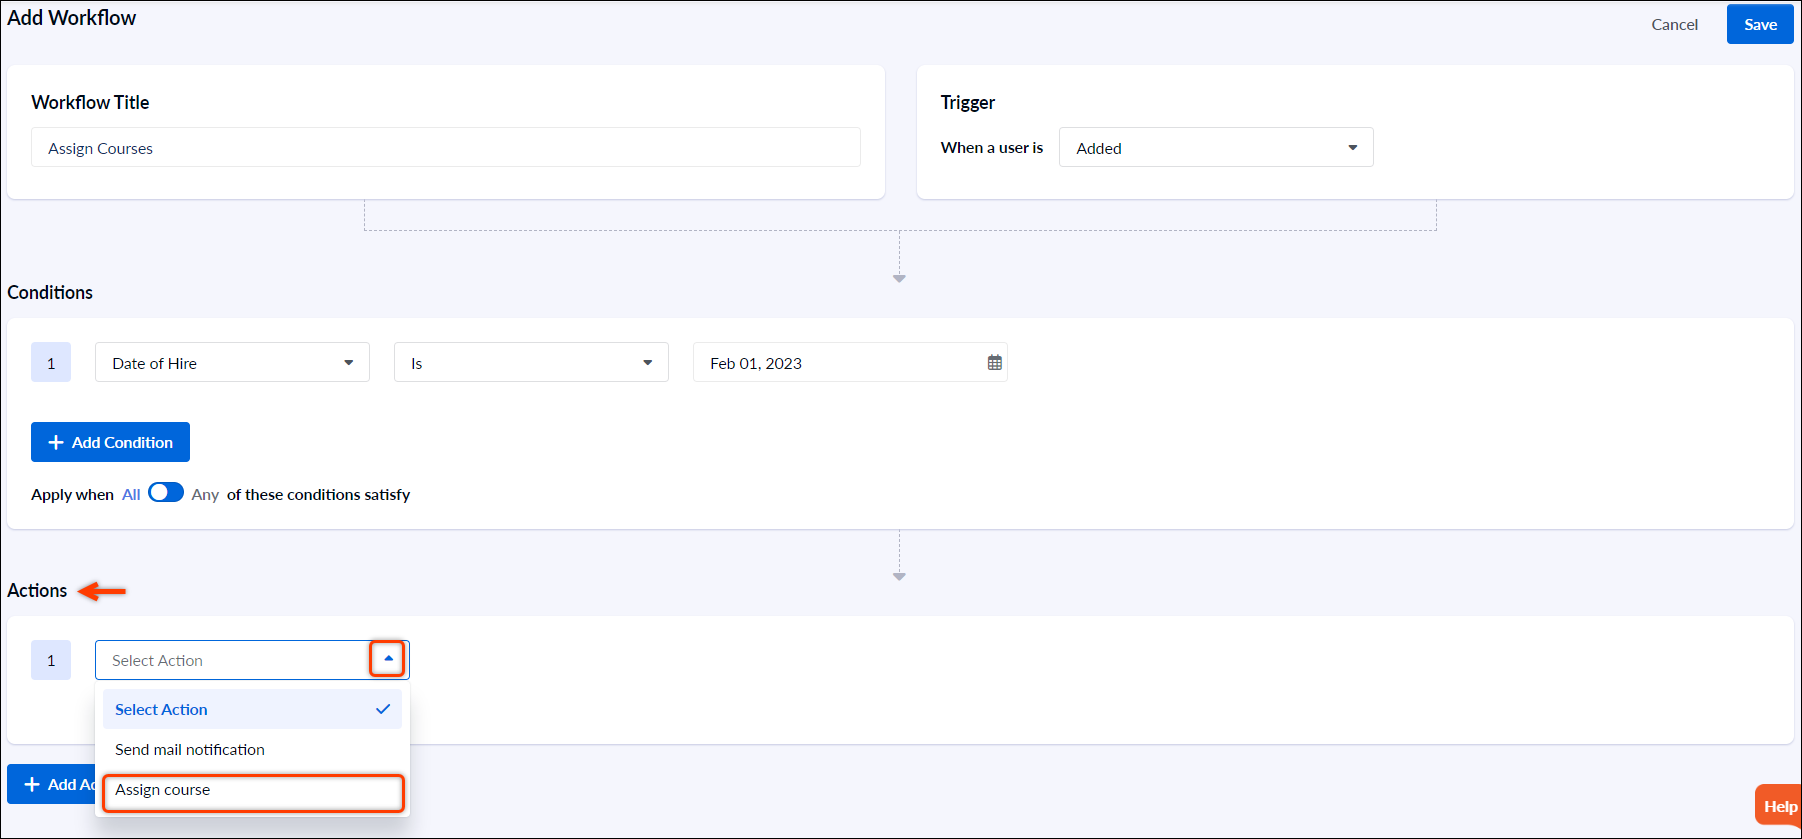
Step 9: Select the courses you want to assign and click Save.![8.png](https://help.engagedly.com/hubfs/Knowledge%20Base%20Import/15327488149273-1.png)
![8.png](https://help.engagedly.com/hubfs/Knowledge%20Base%20Import/15327488149273-1.png)
Step 10: Select the Due Date toggle button to Yes to set the due date for the course assigned.![9.png](https://help.engagedly.com/hubfs/Knowledge%20Base%20Import/15327503047449-1.png)
![9.png](https://help.engagedly.com/hubfs/Knowledge%20Base%20Import/15327503047449-1.png)
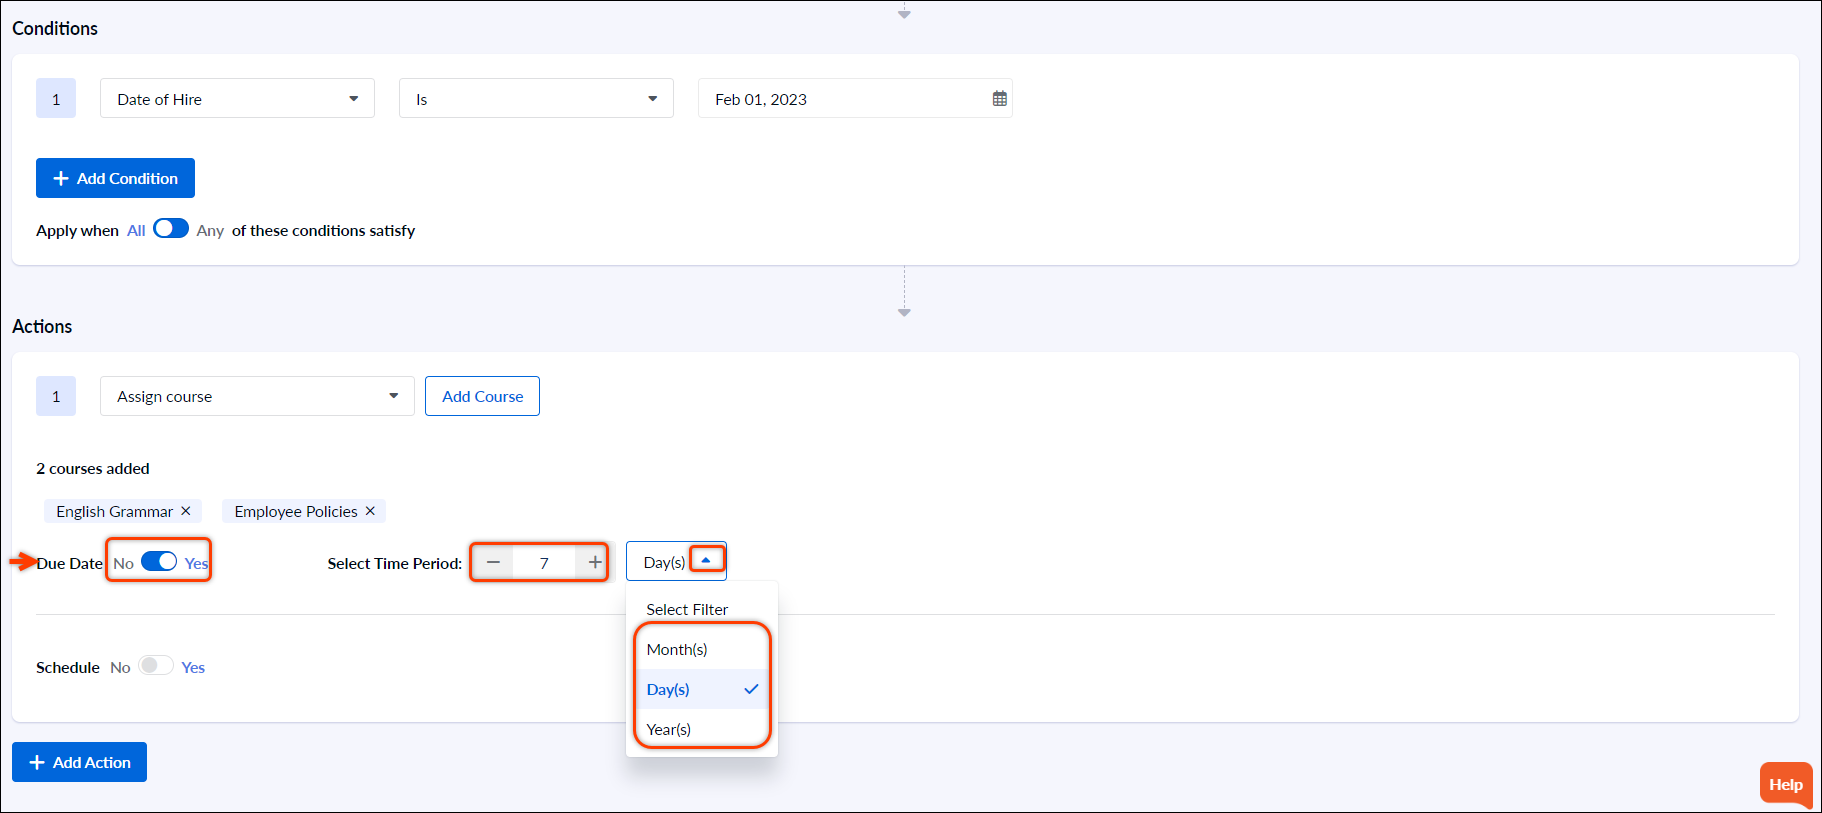
Step 11: To schedule the action for a specific time period, select the Schedule toggle button to Yes.![10.png](https://help.engagedly.com/hubfs/Knowledge%20Base%20Import/15327488273305-1.png)
![10.png](https://help.engagedly.com/hubfs/Knowledge%20Base%20Import/15327488273305-1.png)
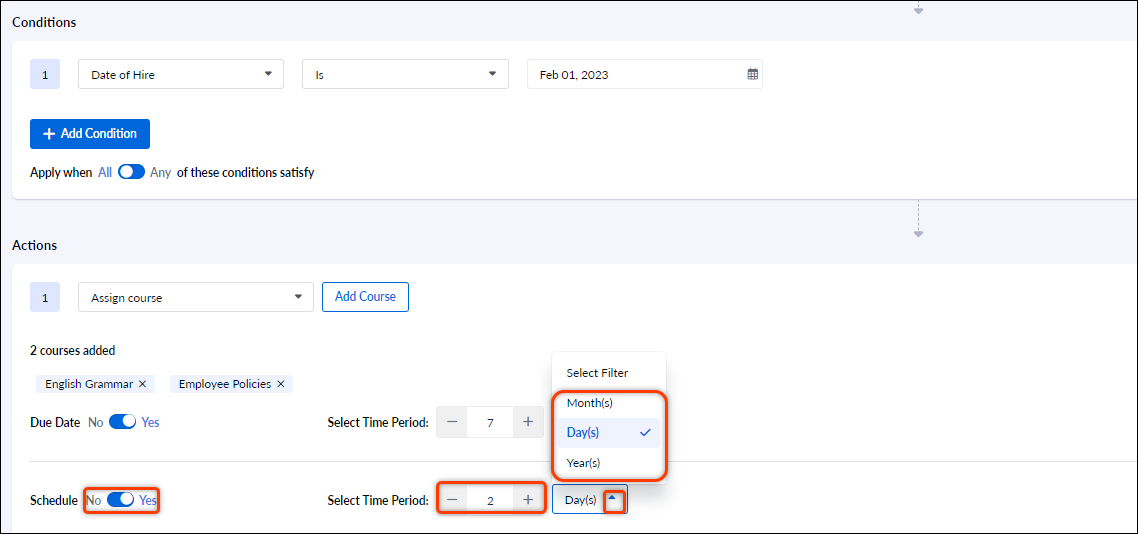
Step 12: Click Save to save the setting.![11.png](https://help.engagedly.com/hubfs/Knowledge%20Base%20Import/15327503125145-1.png)
![11.png](https://help.engagedly.com/hubfs/Knowledge%20Base%20Import/15327503125145-1.png)
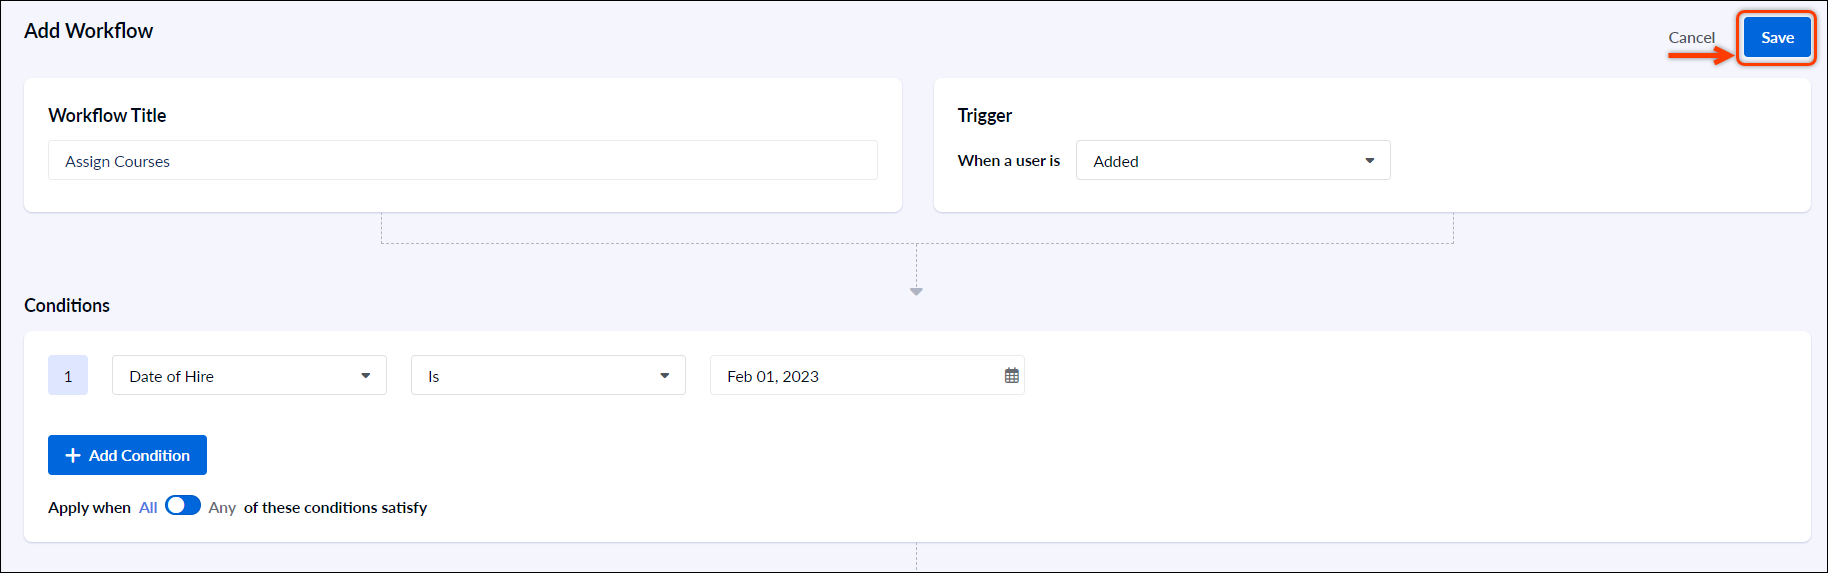
Step 13: The workflow is now created.![12.png](https://help.engagedly.com/hubfs/Knowledge%20Base%20Import/15327538741145-1.png)
![12.png](https://help.engagedly.com/hubfs/Knowledge%20Base%20Import/15327538741145-1.png)