
- Help Center
- Integrations
- Single Sign On
Integrate Azure AD (Office 365) with Engagedly
Follow the steps to set up SSO with Azure AD:
Step 1: Navigate to Settings > Integrations.
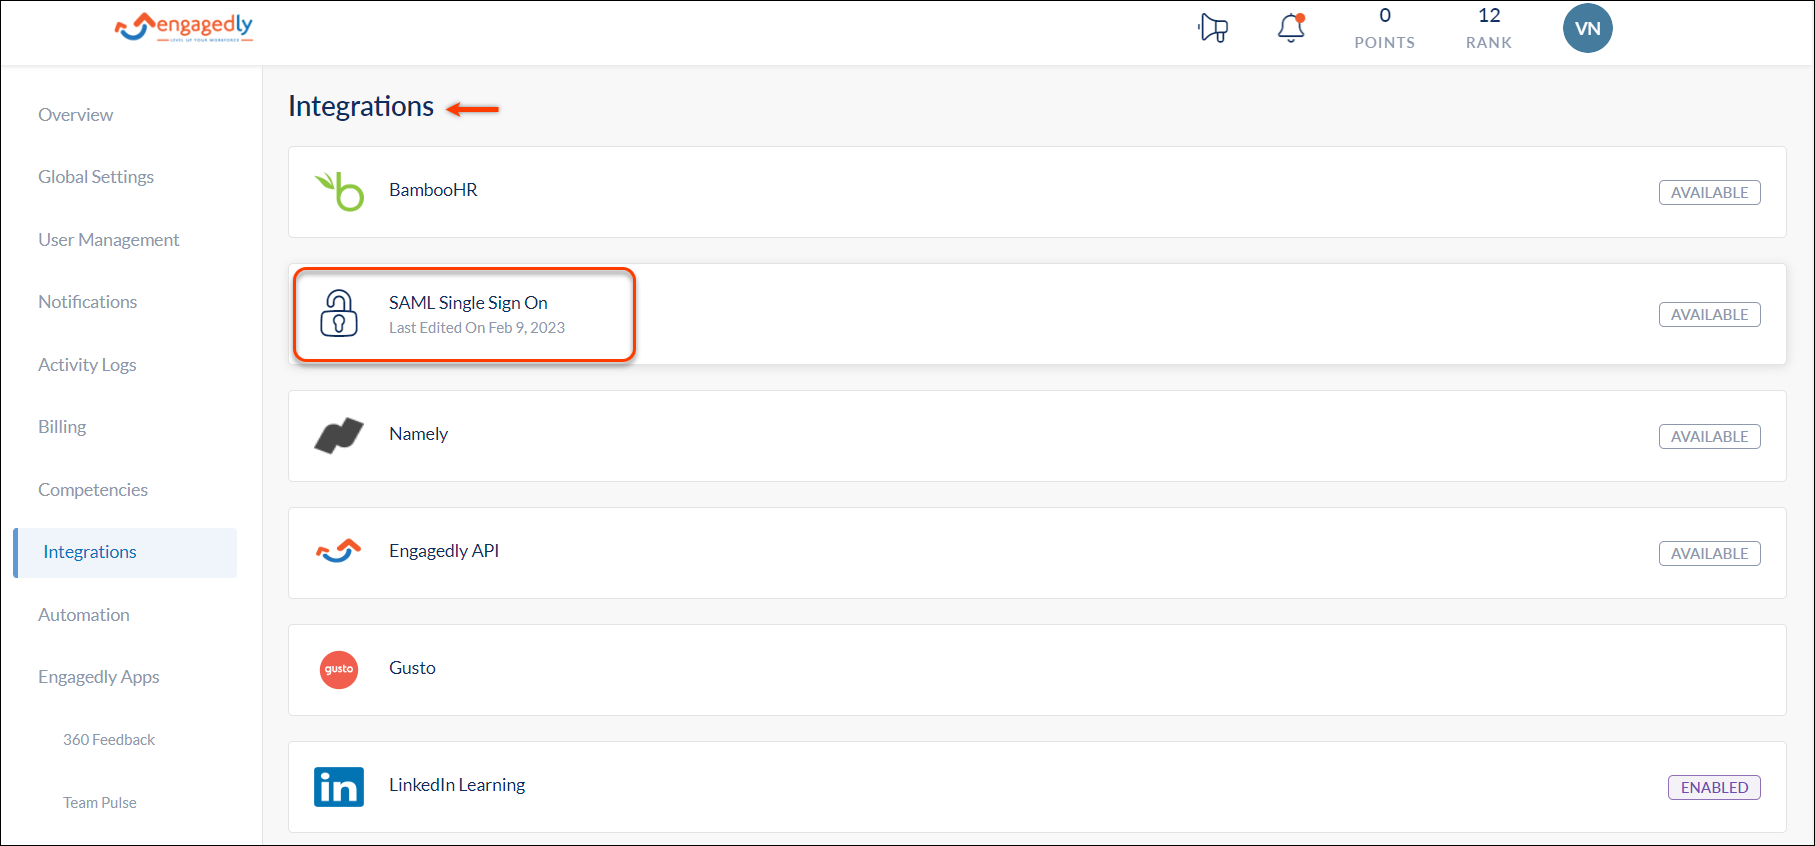
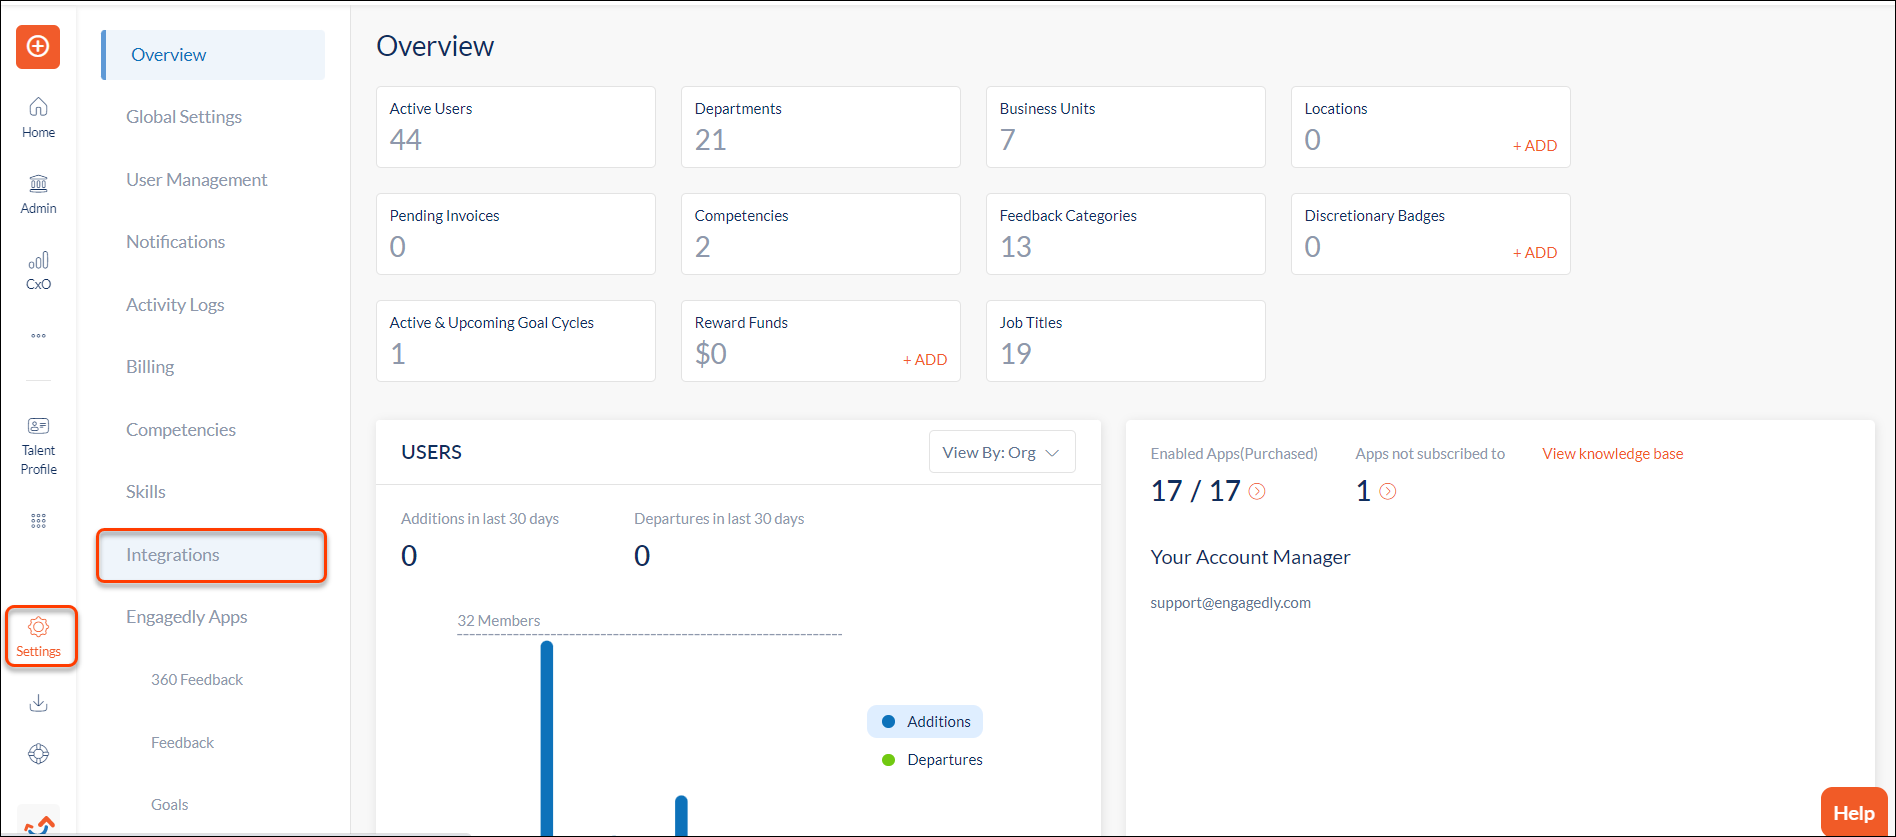 Step 2: In the Integrations window, select SAML Single Sign On.
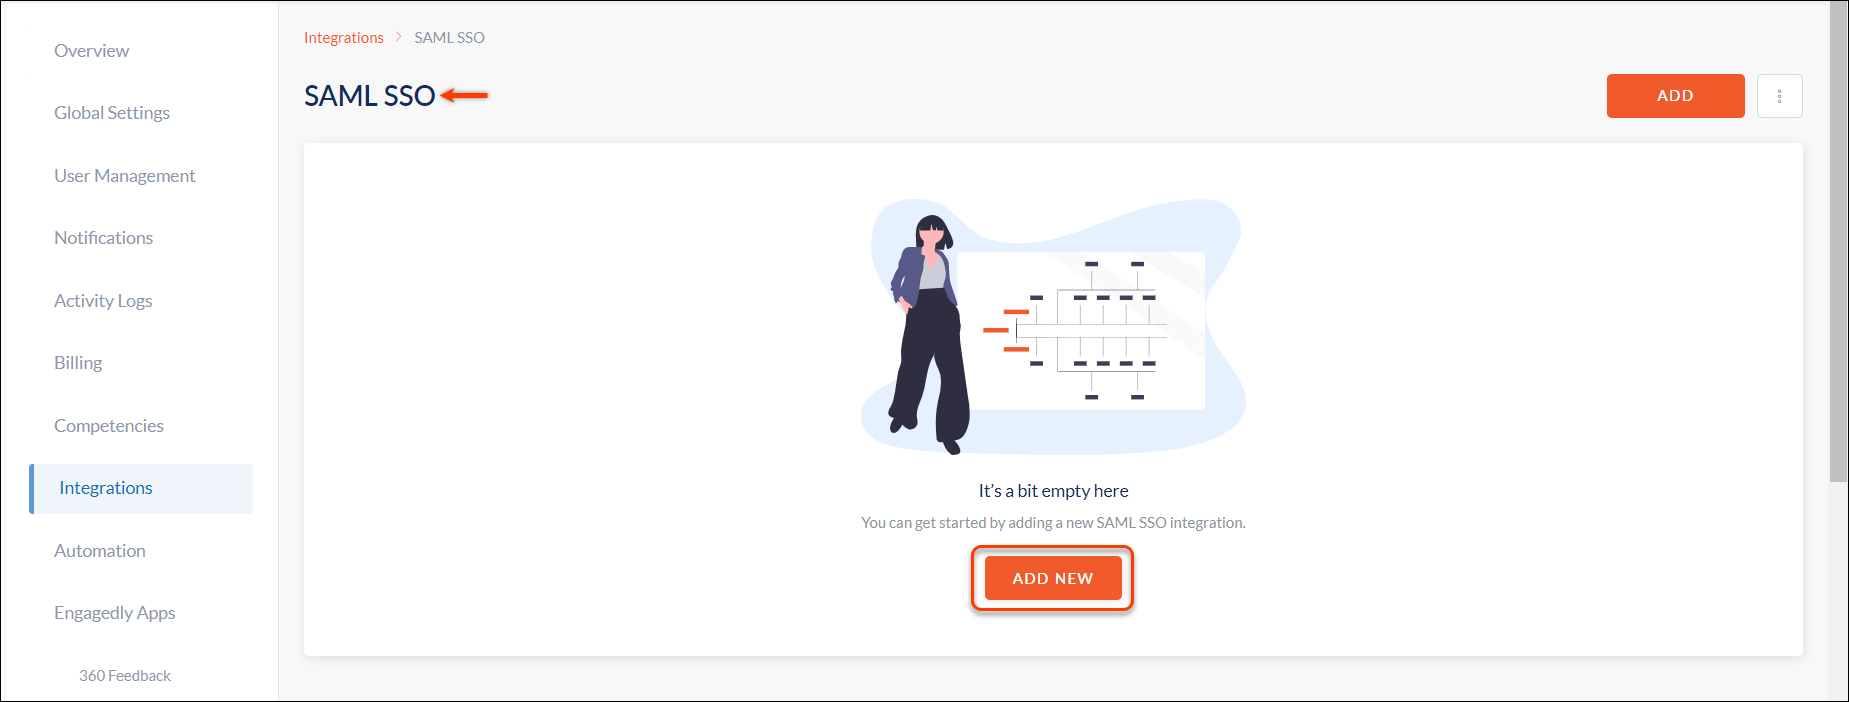
 Step 3: In the SAML SSO window, click ADD NEW.
 Step 4: In the ADD SAML SSO window, enable SAML, type the Identifier Name as required, and click SAVE.
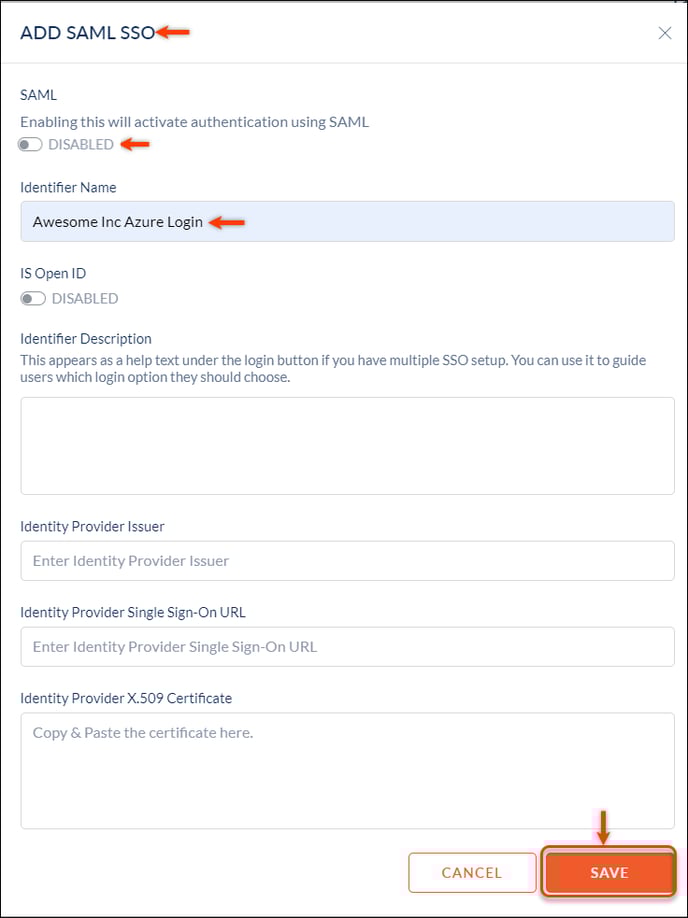
Once saved, the system will generate the ACS URL and Entity ID.
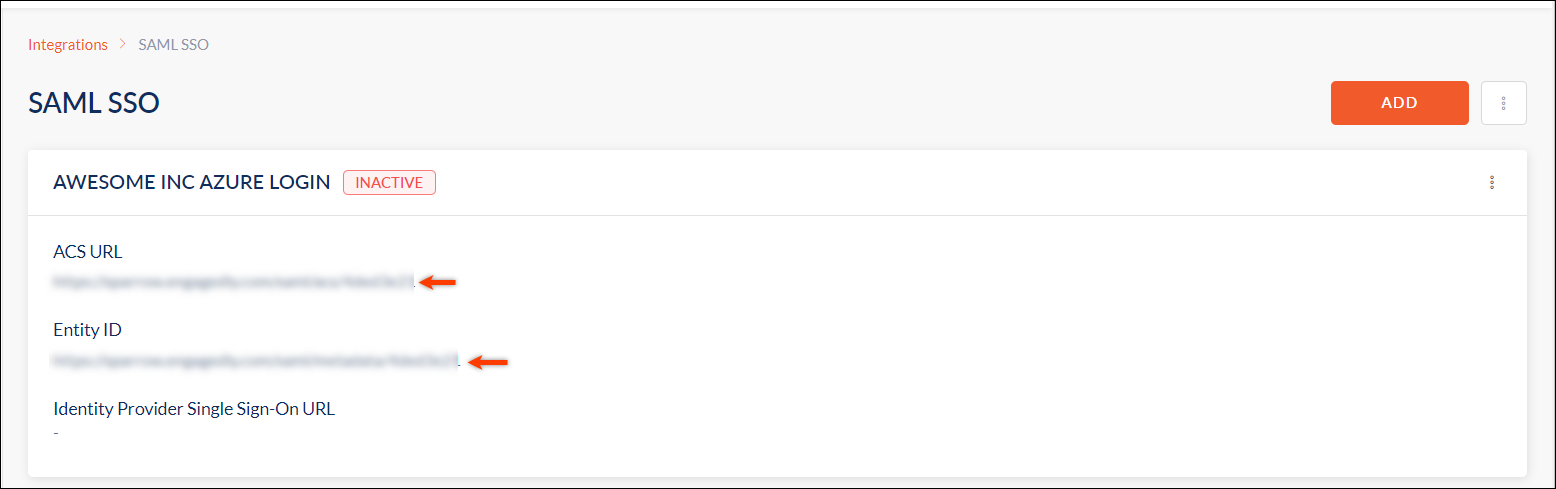
Note: Use the ACS URL and Entity ID in step 13 to configure basic SAML.
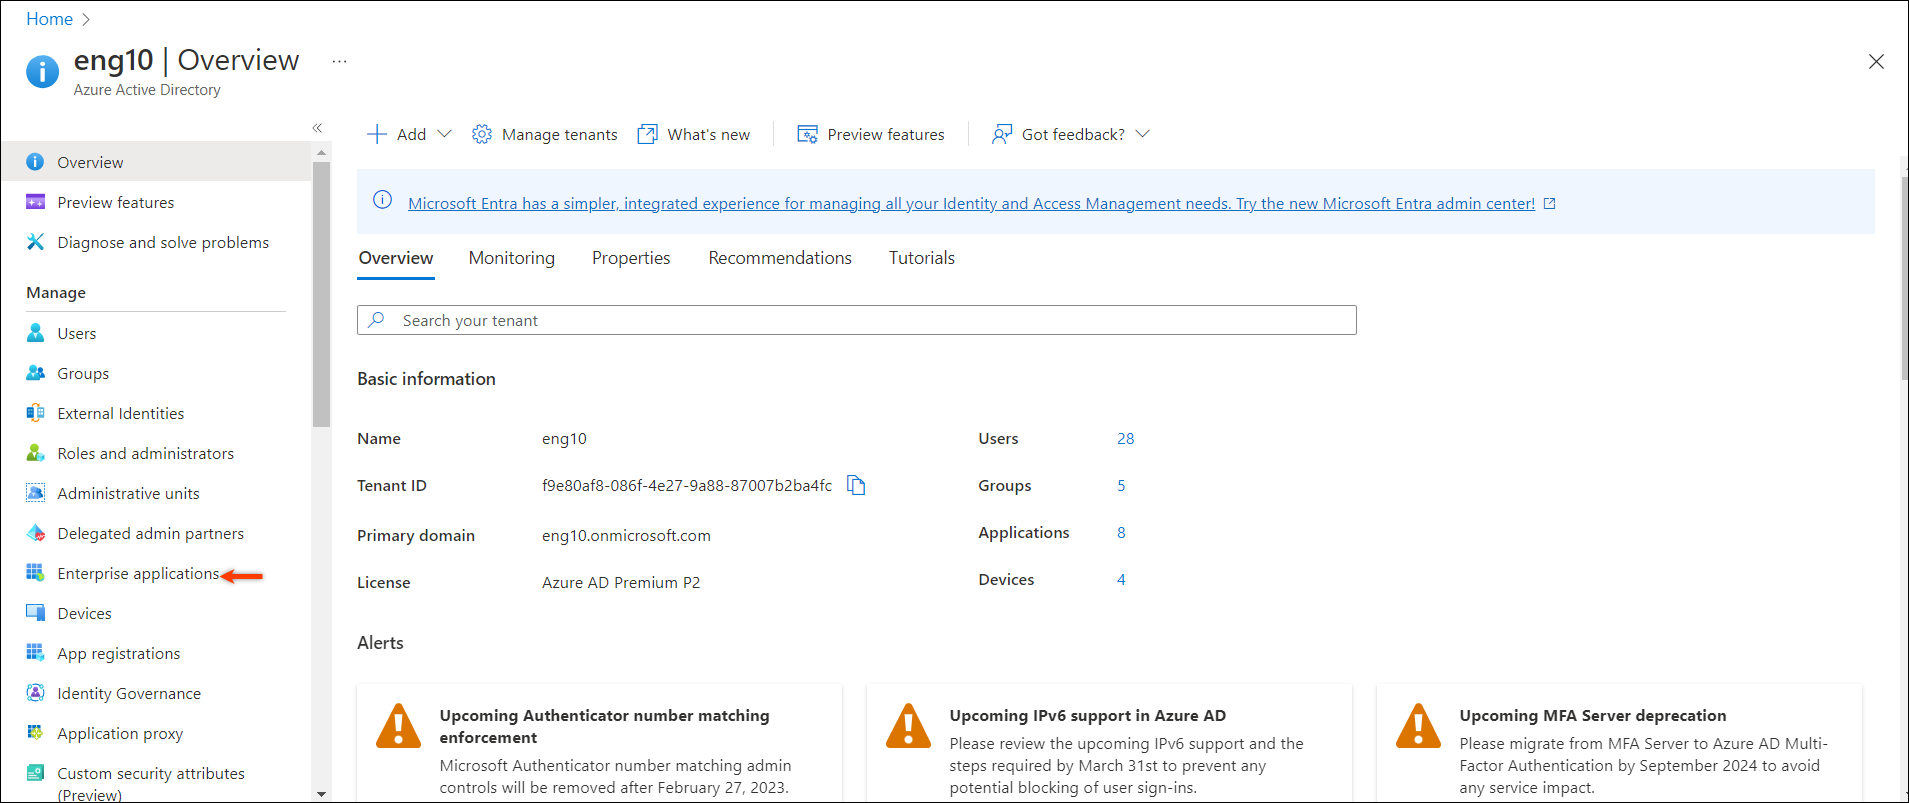
Step 5: Log in to your Azure portal and on the left pane, navigate to Azure Active Directory.
It redirects you to the Overview window.
 Step 6: On the left pane, select Enterprise applications.
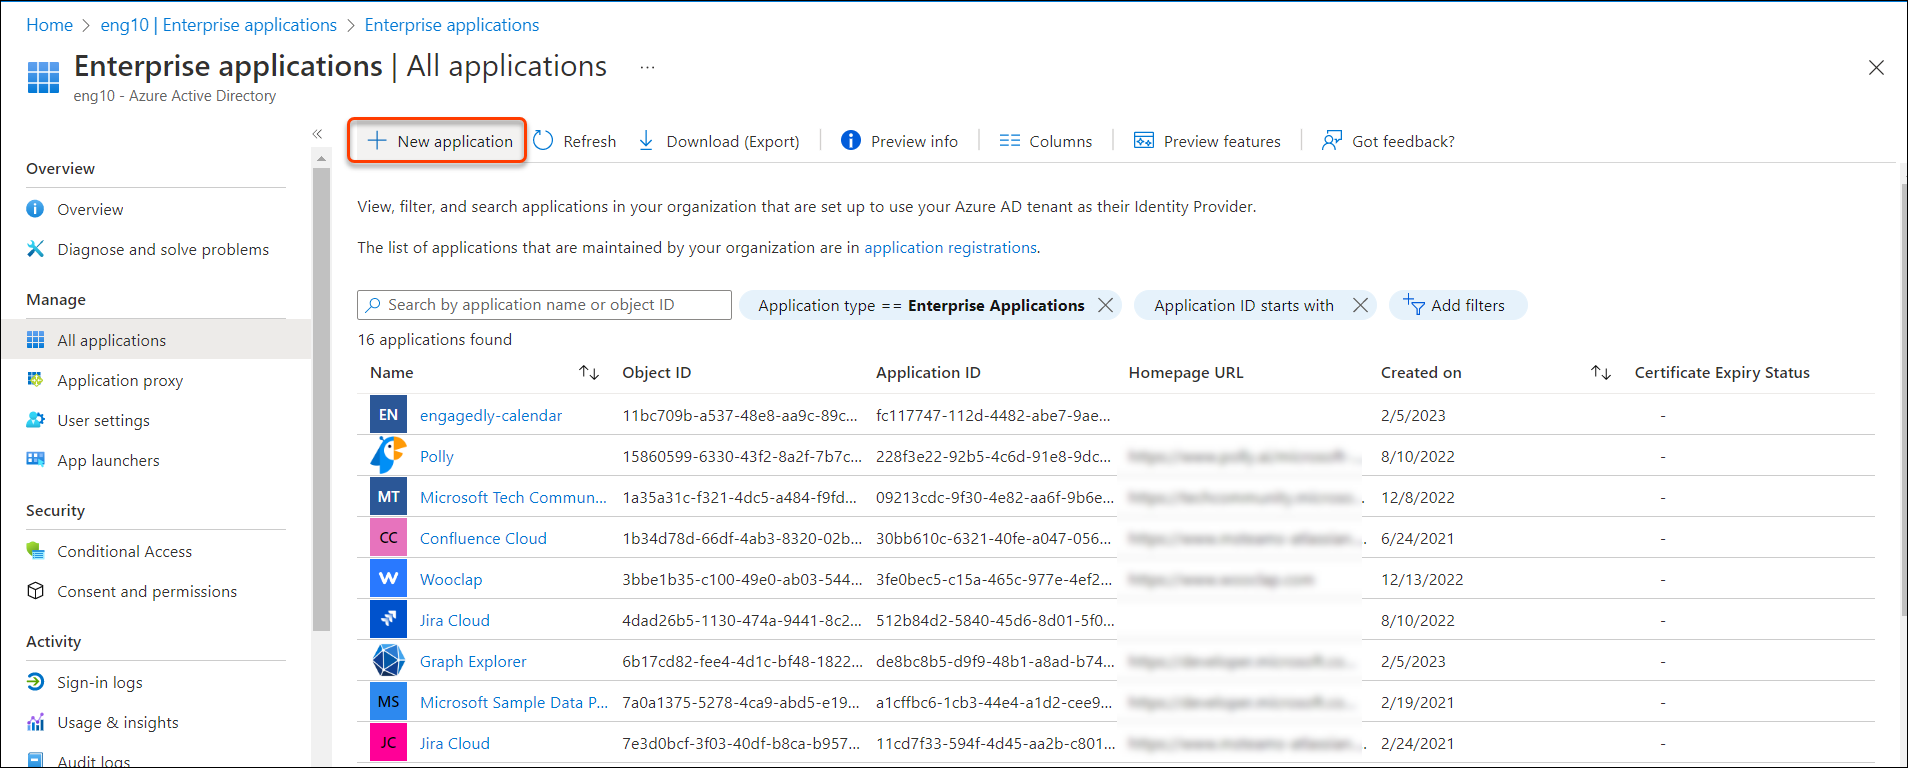
Step 7: In the Enterprise Applications, click + New application to add your application.
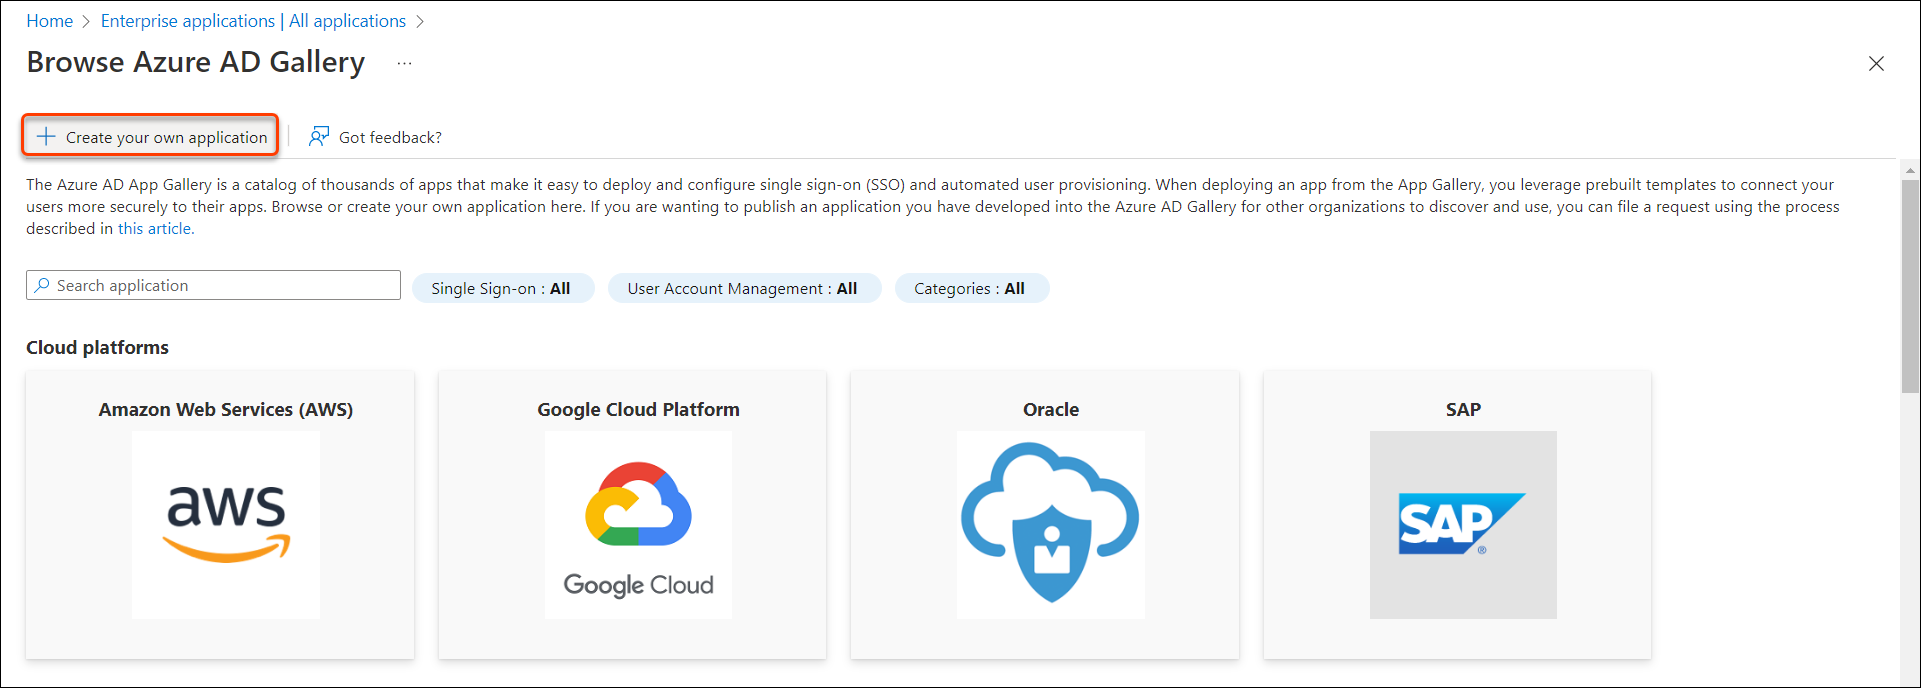
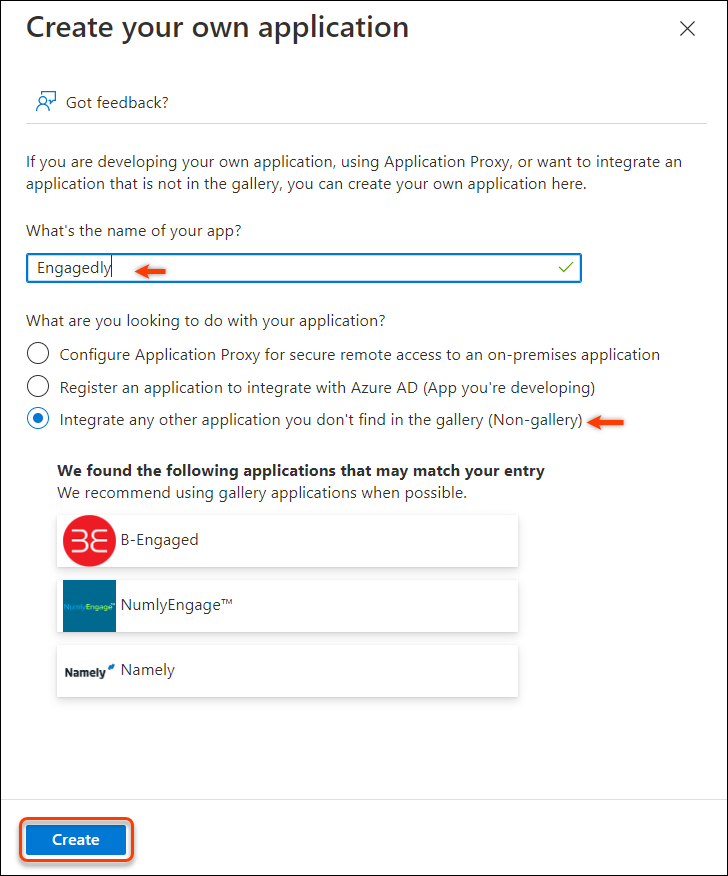
Step 8: In the Browse Azure AD Gallery window, click Create your own application.
Step 9: Type a name in the name field, select Non-gallery and click Create.
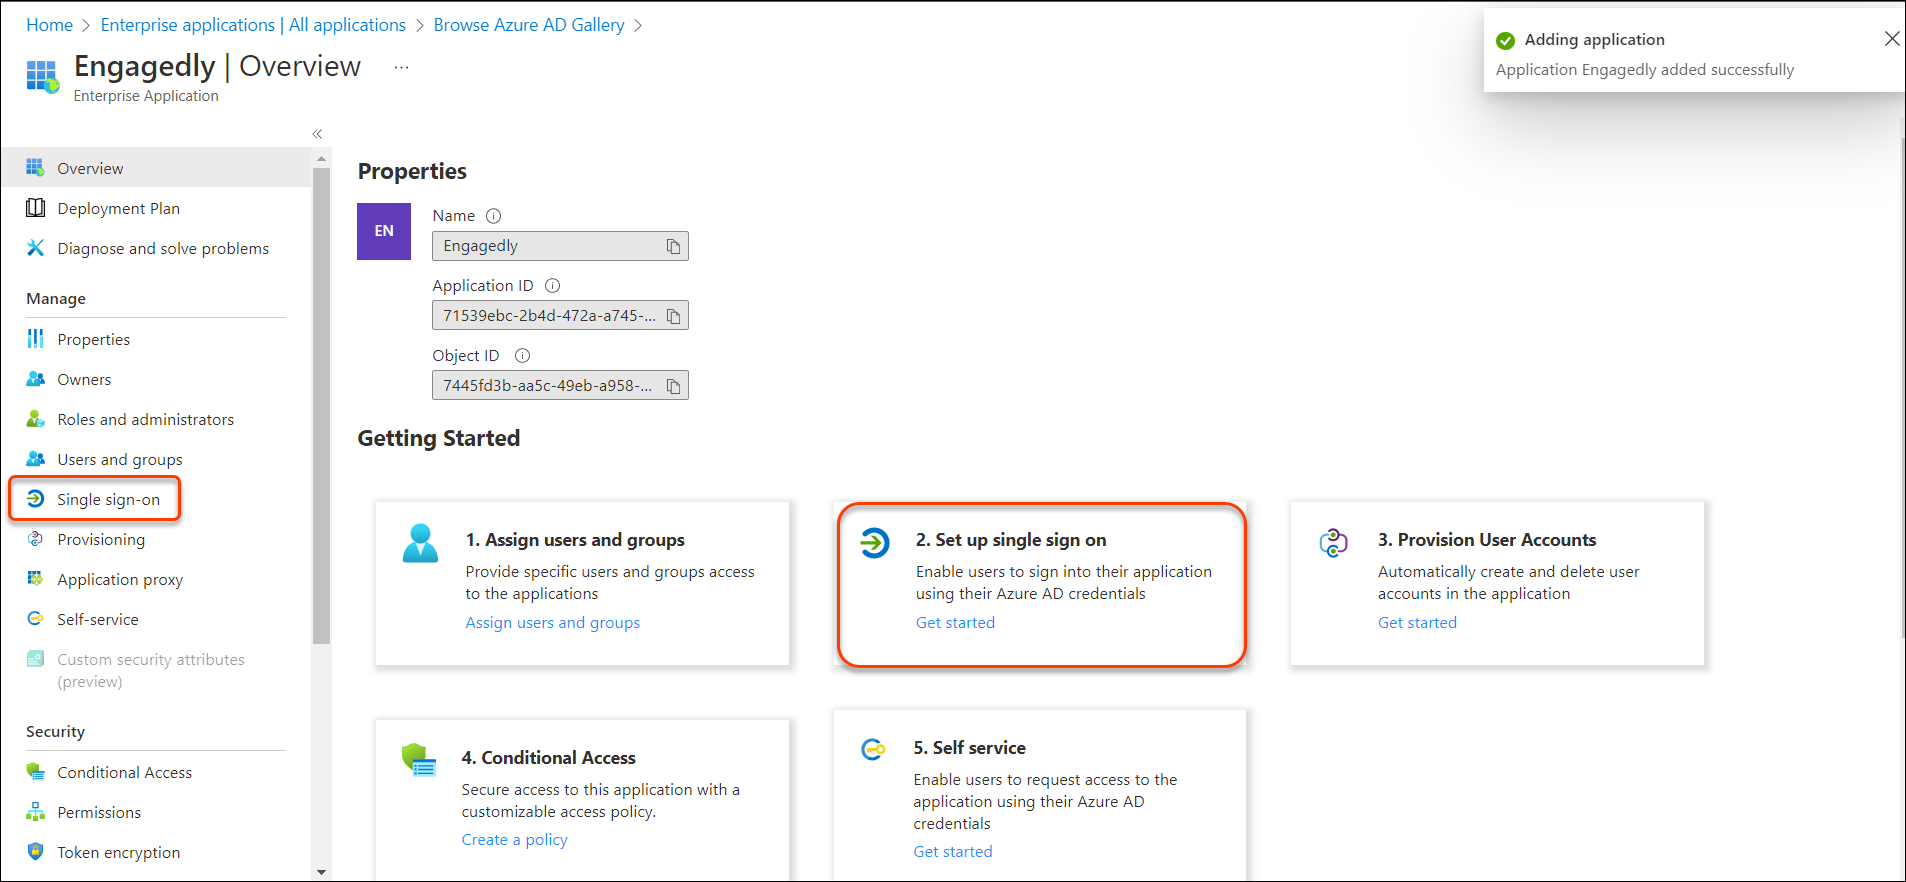
 Step 10: In the Overview window, select Set up single sign on.
Note: You can also select the Single sign-on option from the left pane.
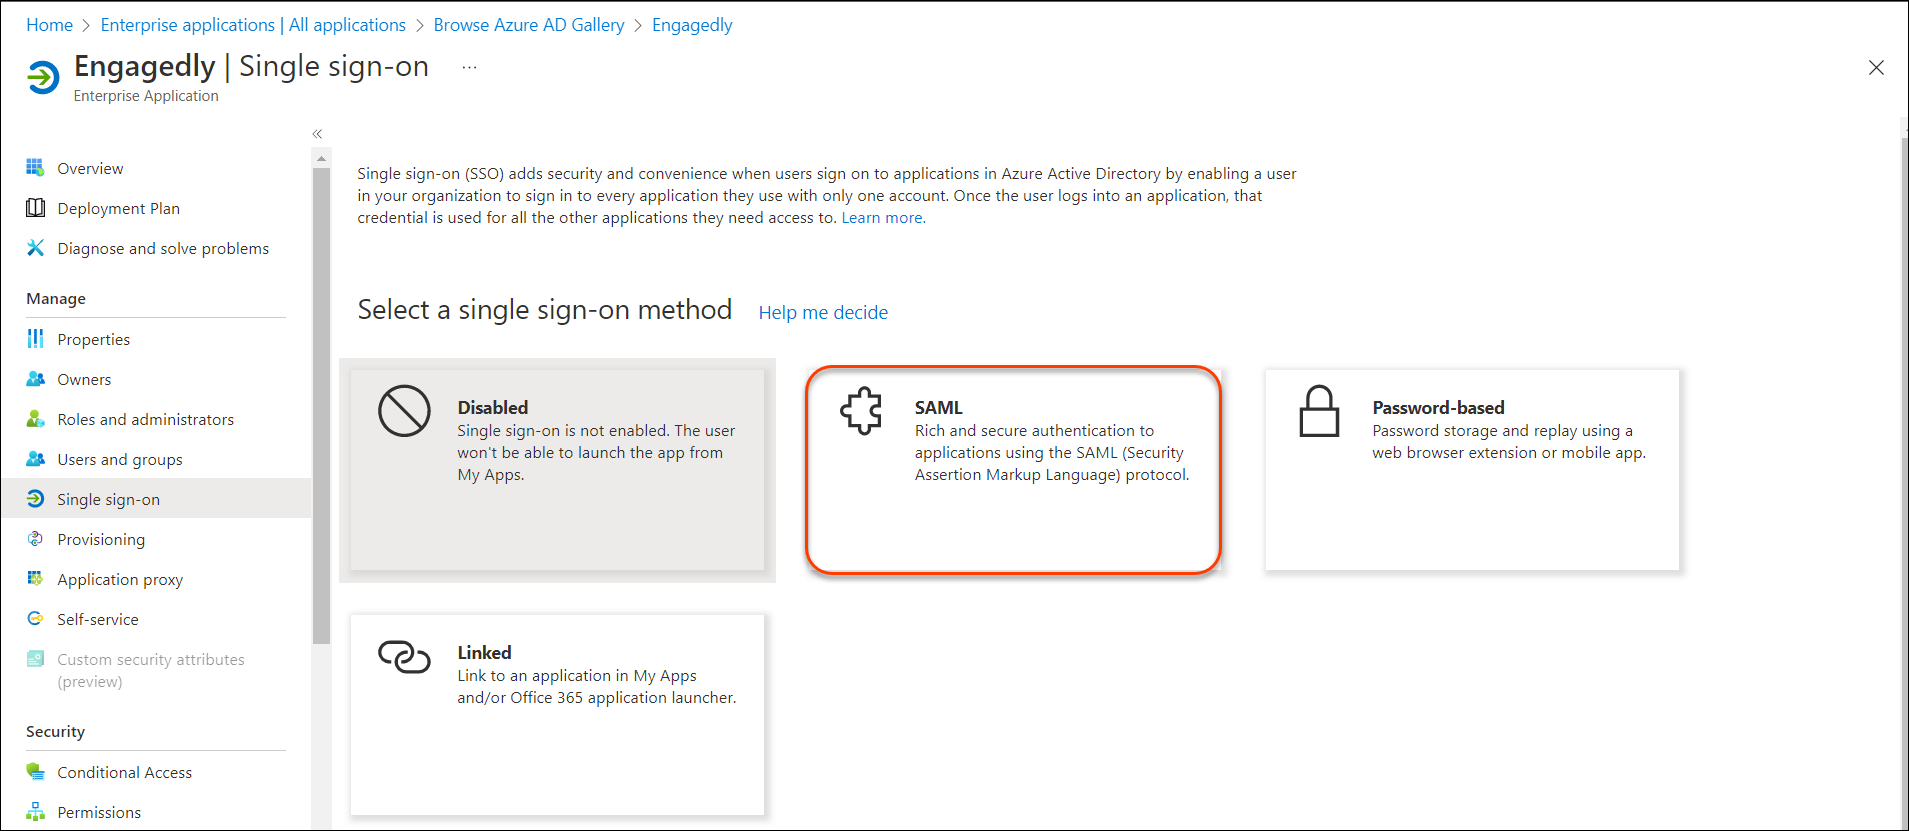
Step 11: Select SAML.
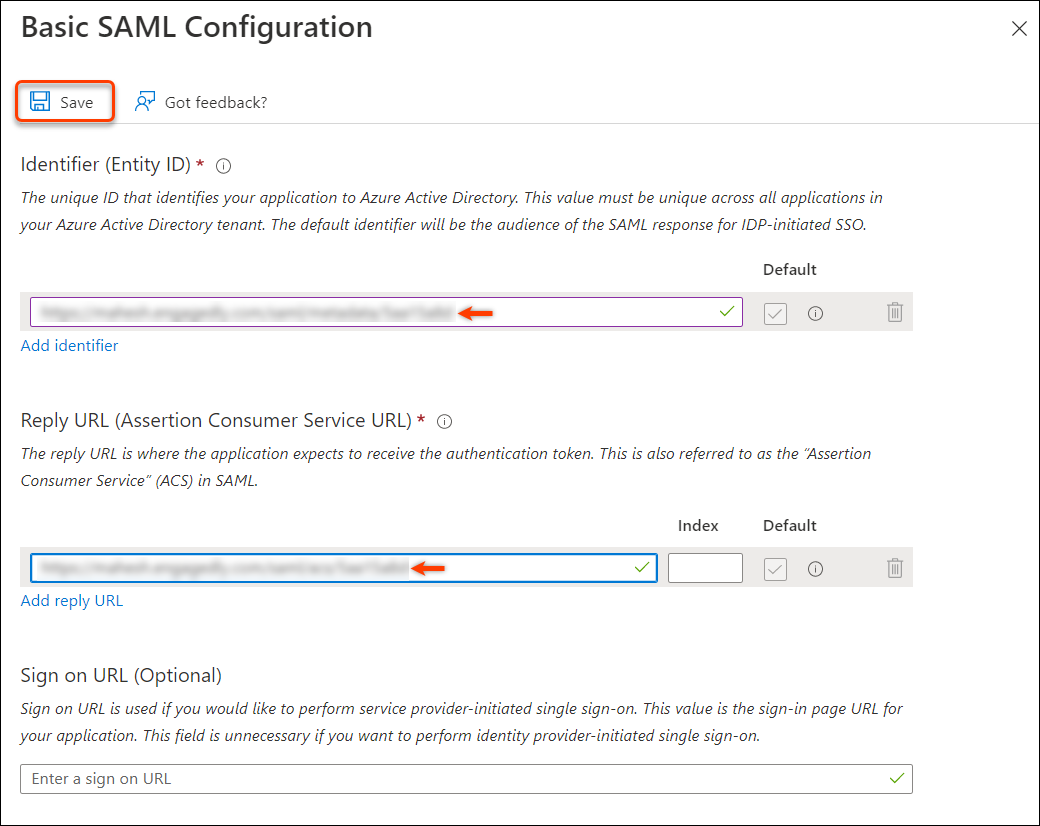
Step 12: In the Basic SAML Configuration, provide the Entity ID and the Assertion Consumer Service URL (ASC URL) that was generated on Engagedly in the Step 5.
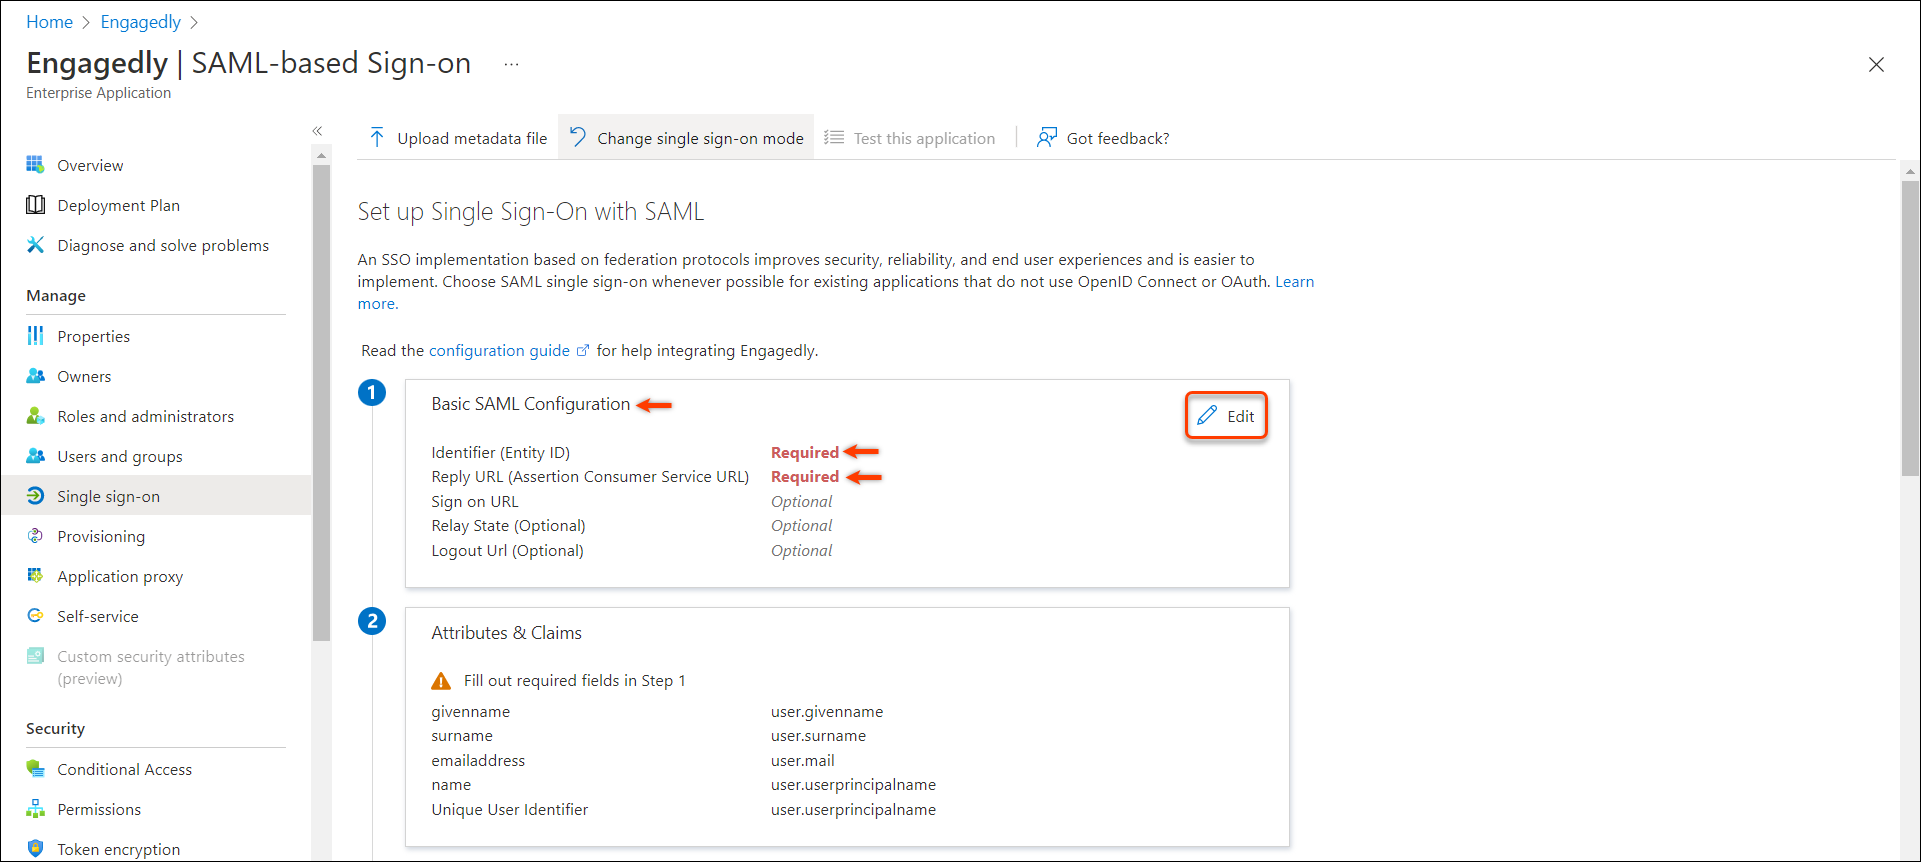 Step 13: Add the Entity ID and ACS URL in their respective fields and click Save to save the configuration.
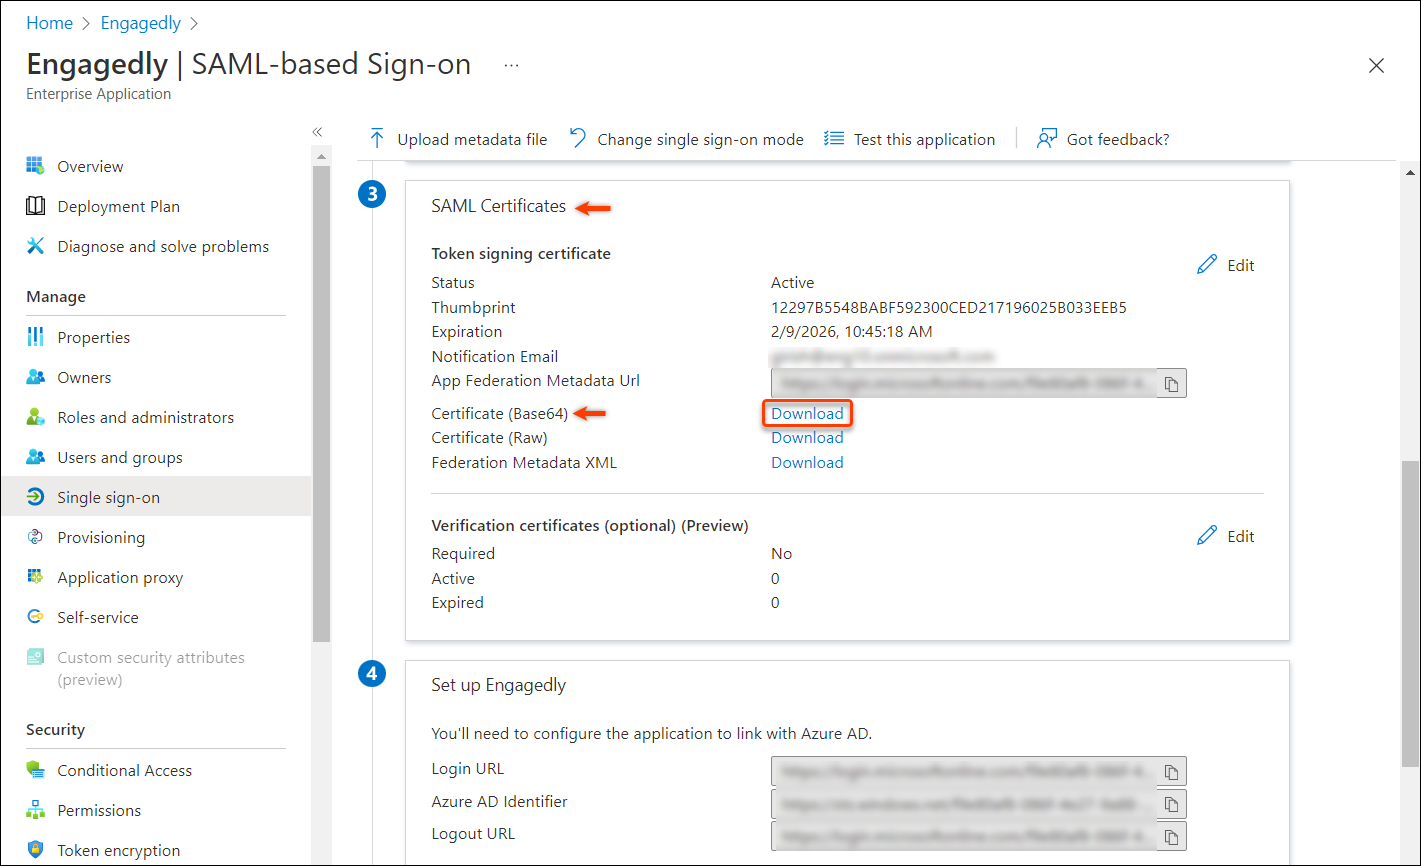
Step 14: Scroll down to the SAML Certificates section and click Download to download the certificate.
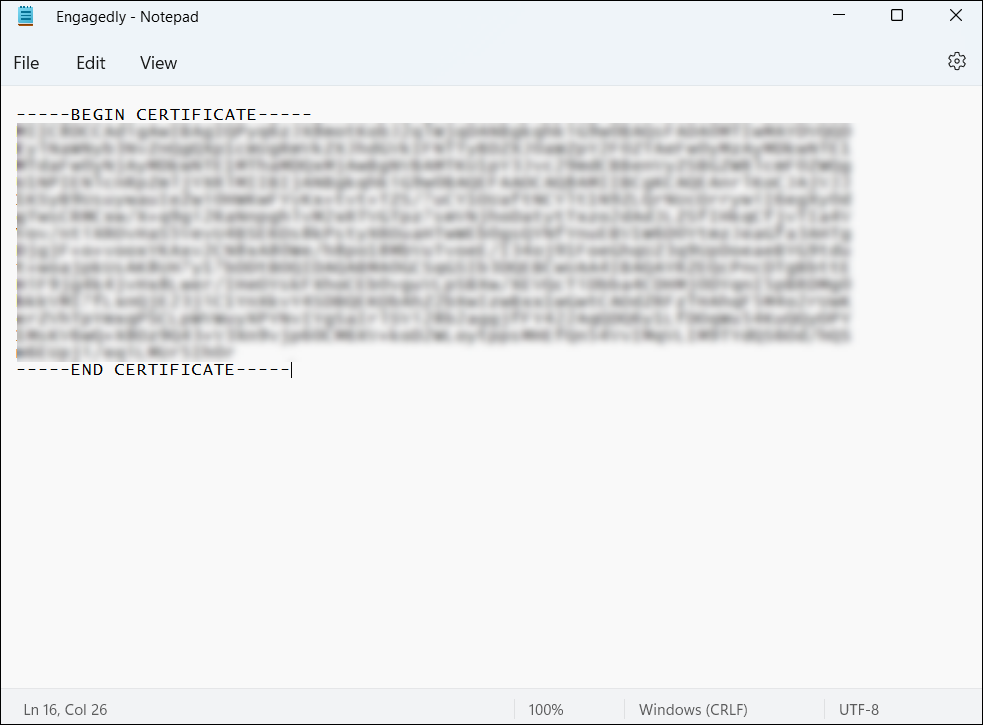
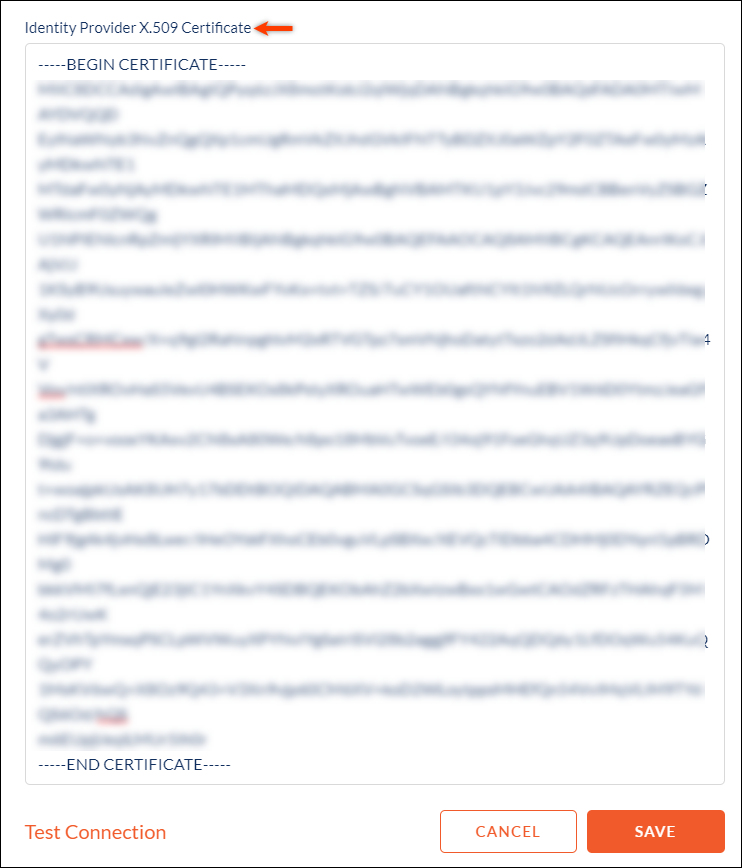
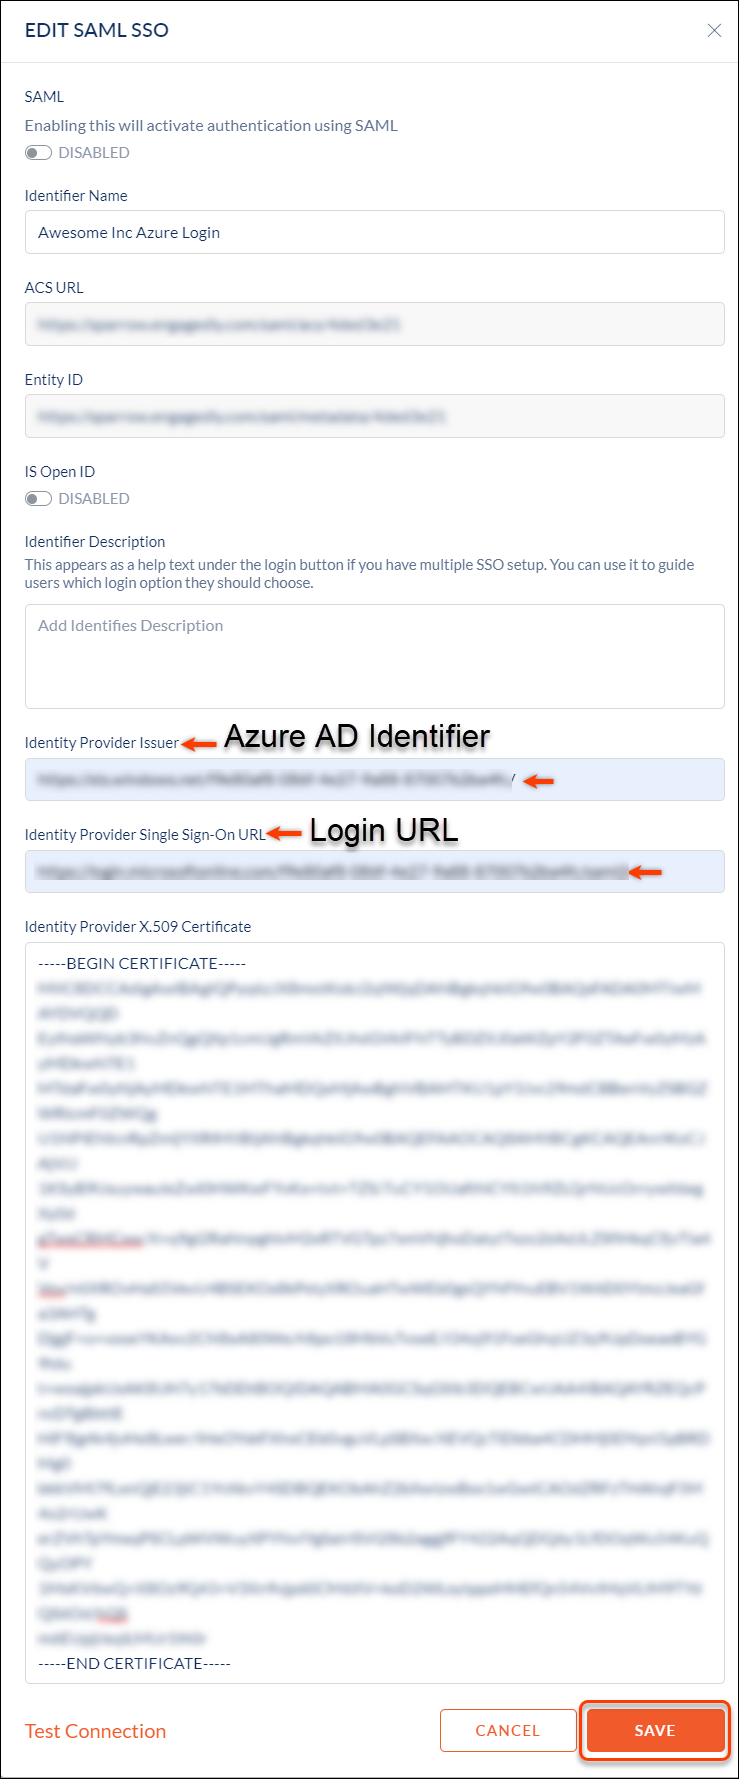
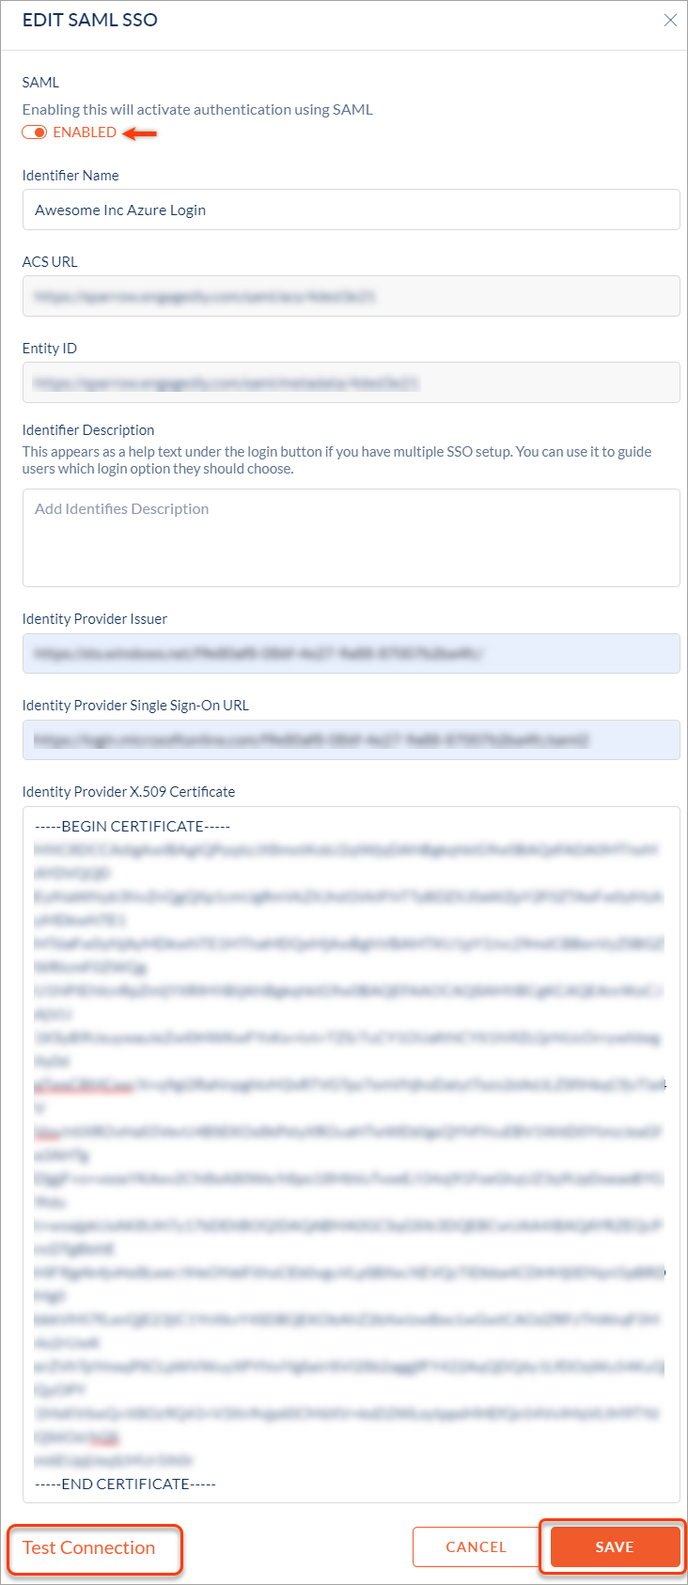
Step 15: Open the certificate file in a text editor and copy the whole content along with the -- BEGIN CERTIFICATE--and-- END CERTIFICATE-- lines and paste it into the certificate field on Engagedly.
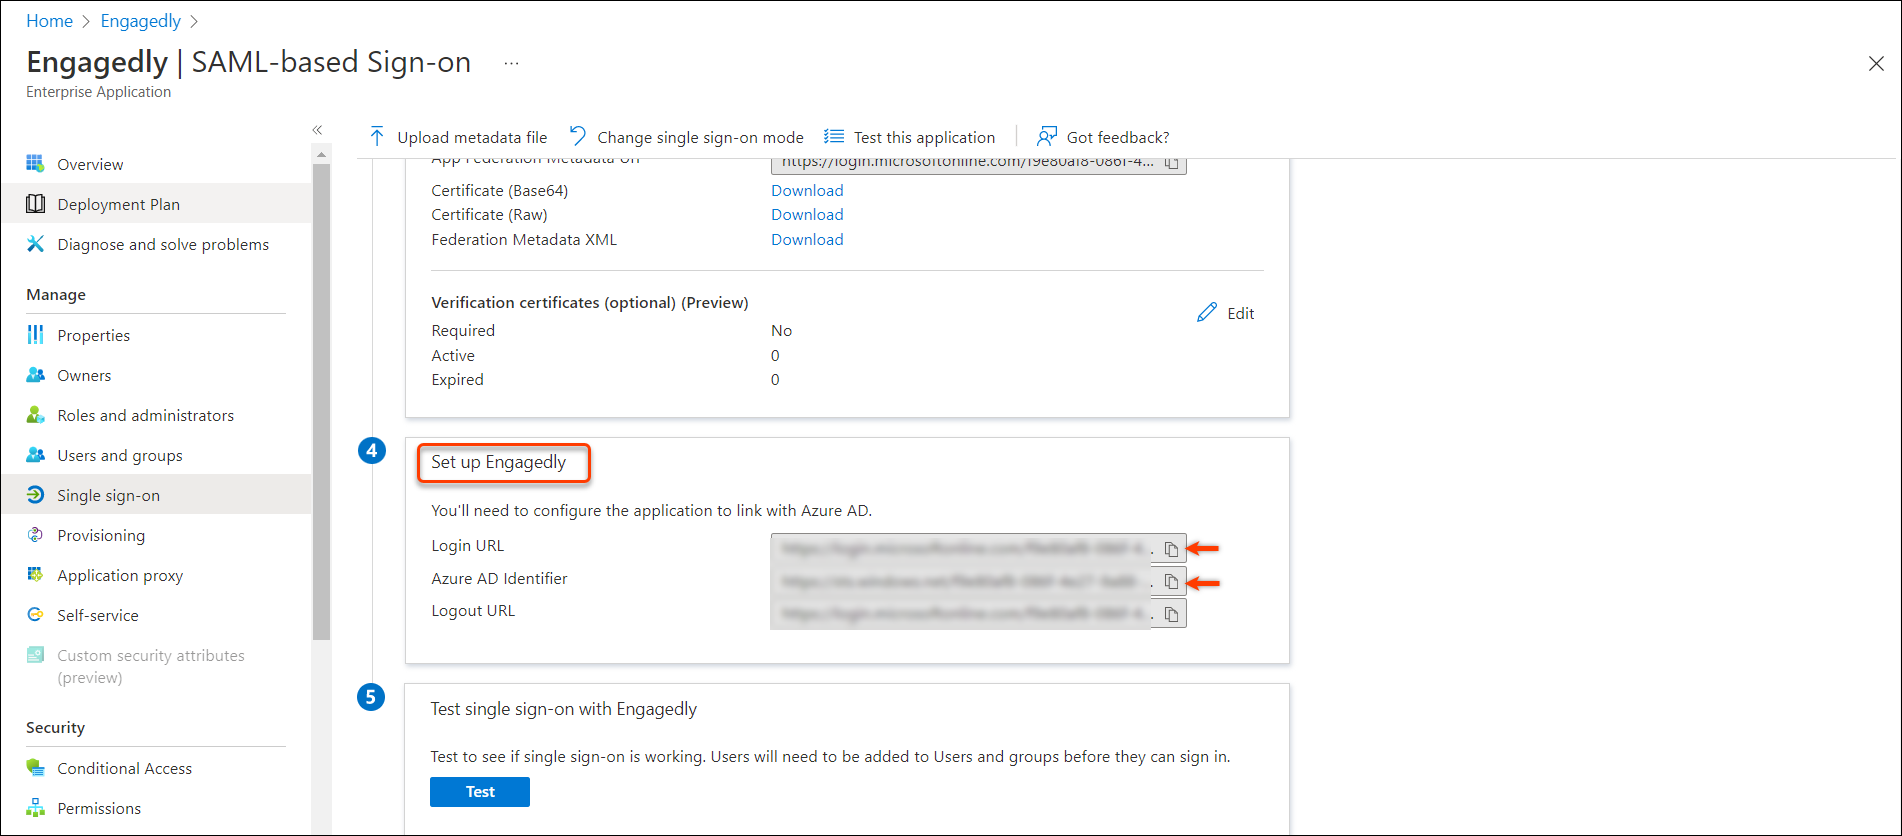
Step 16: Go back to the "Set up Engagedly" section in Azure and copy the "Login URL" to the "Identity Provider Single Sign-On URL" field and the "Azure AD Identifier" to the "Identity Provider Issuer" field in Engagedly. And click SAVE.
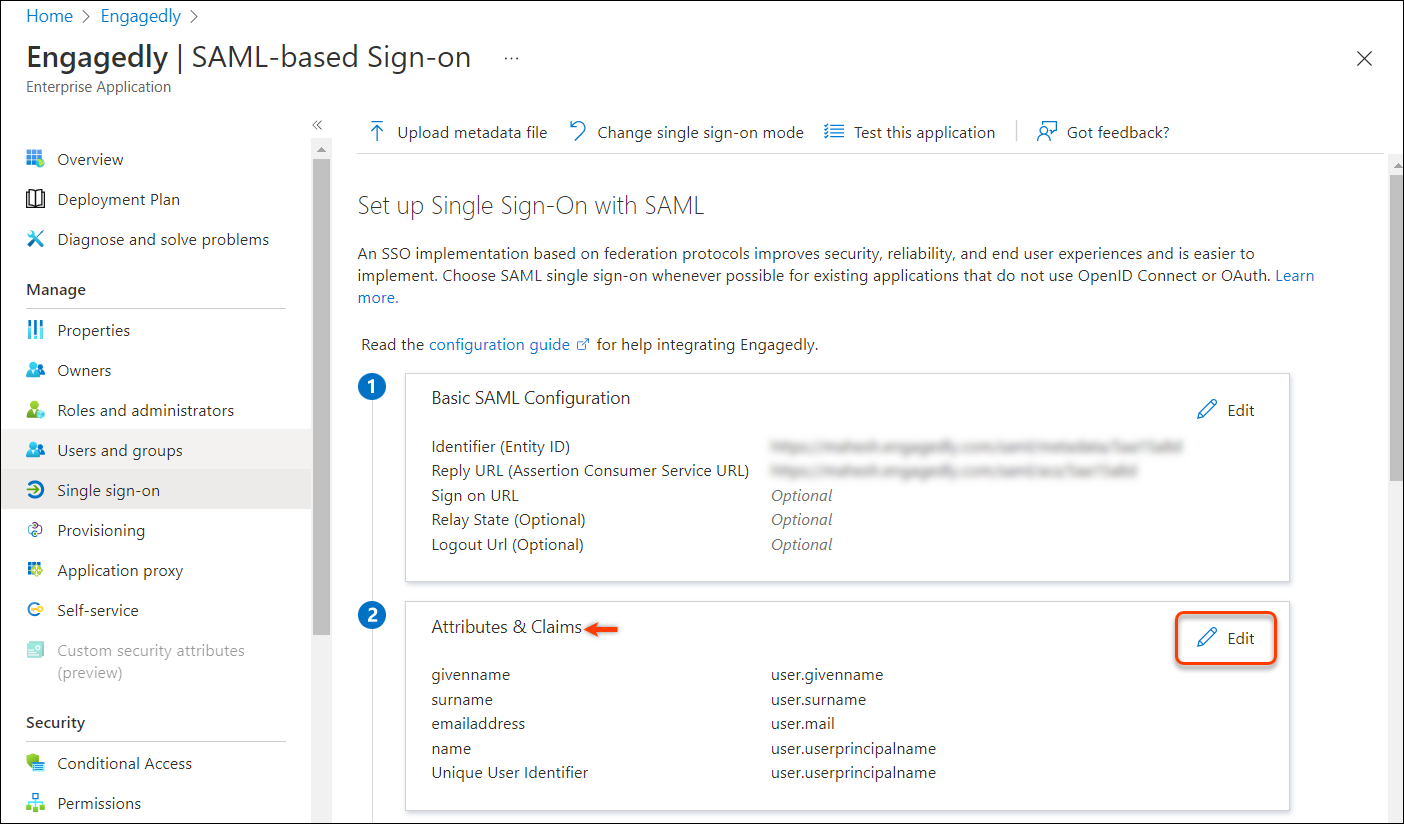
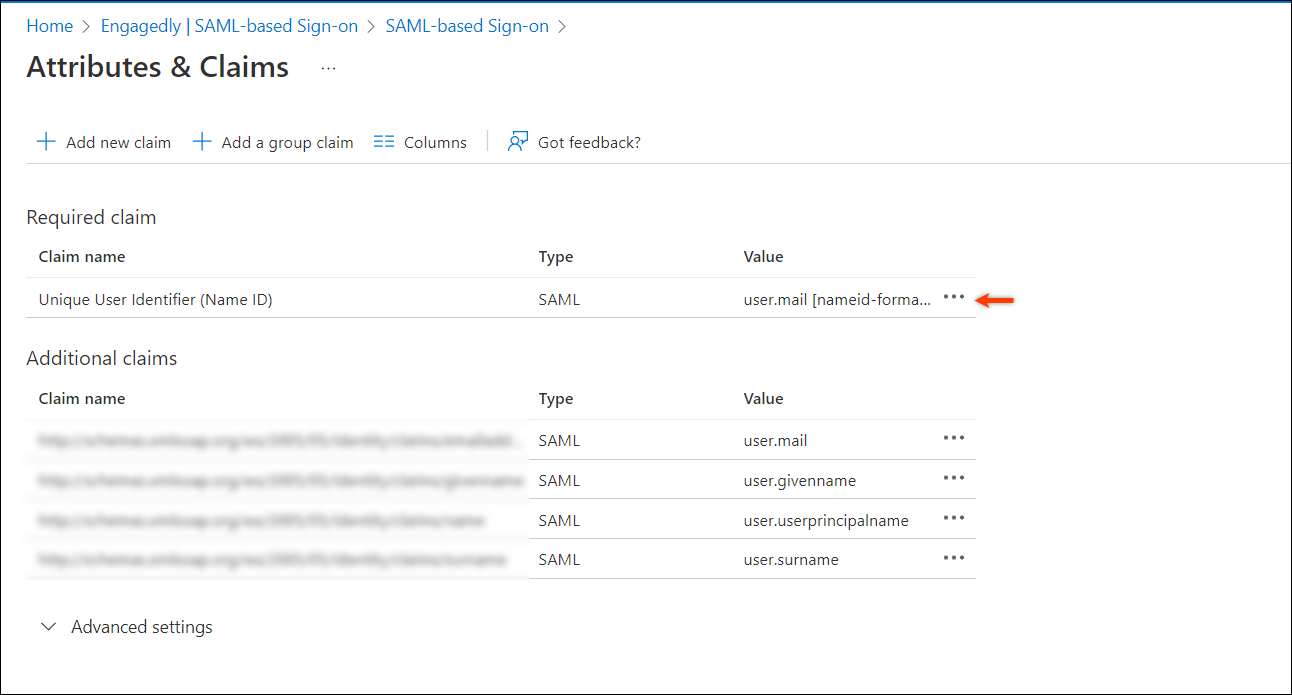
Step 17: In the Attributes & Claims section, click Edit.
Step 18: In the Source attribute drop-down menu, select user.mail.
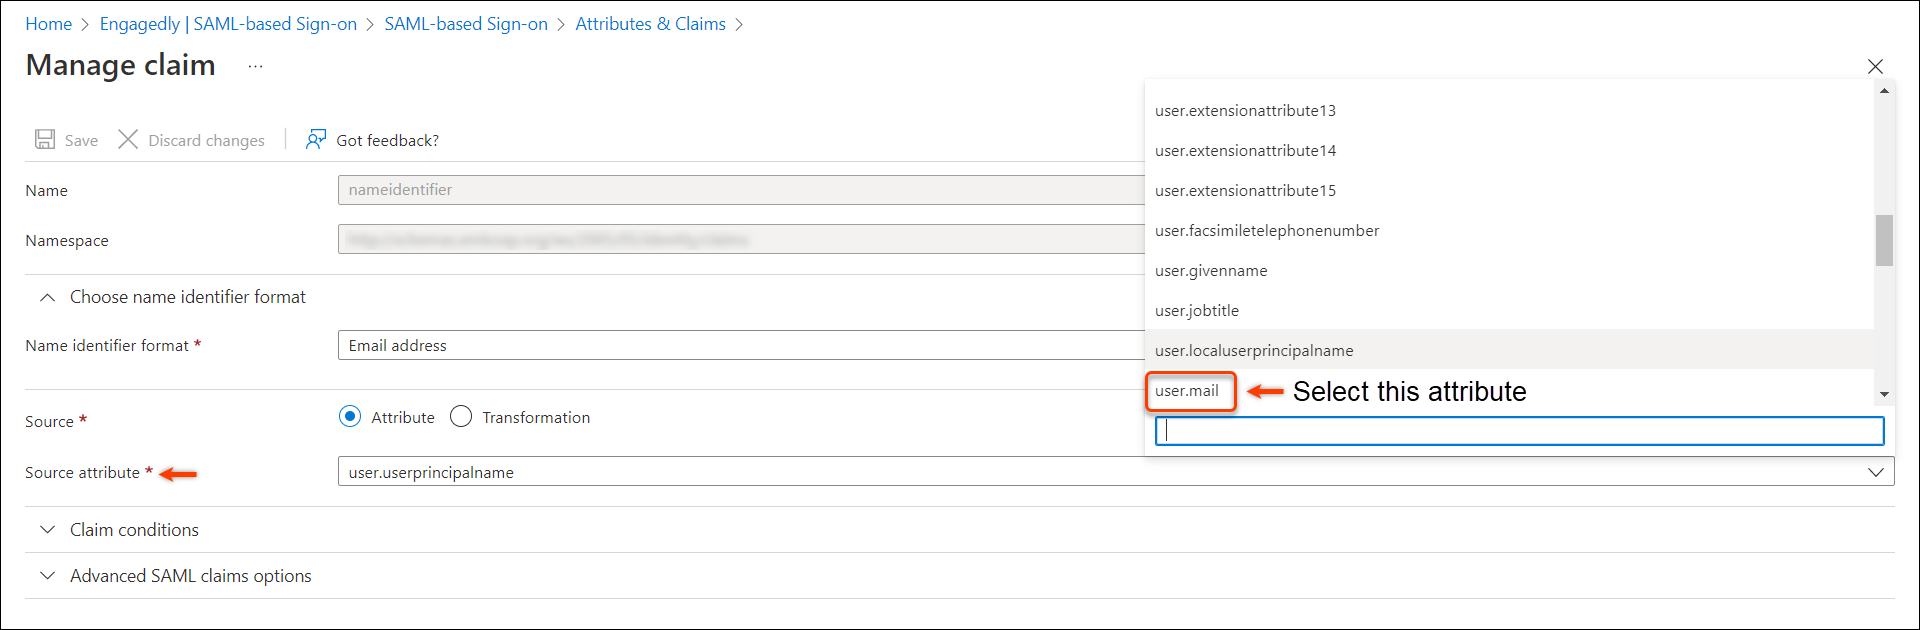
Step 19: Click Save.
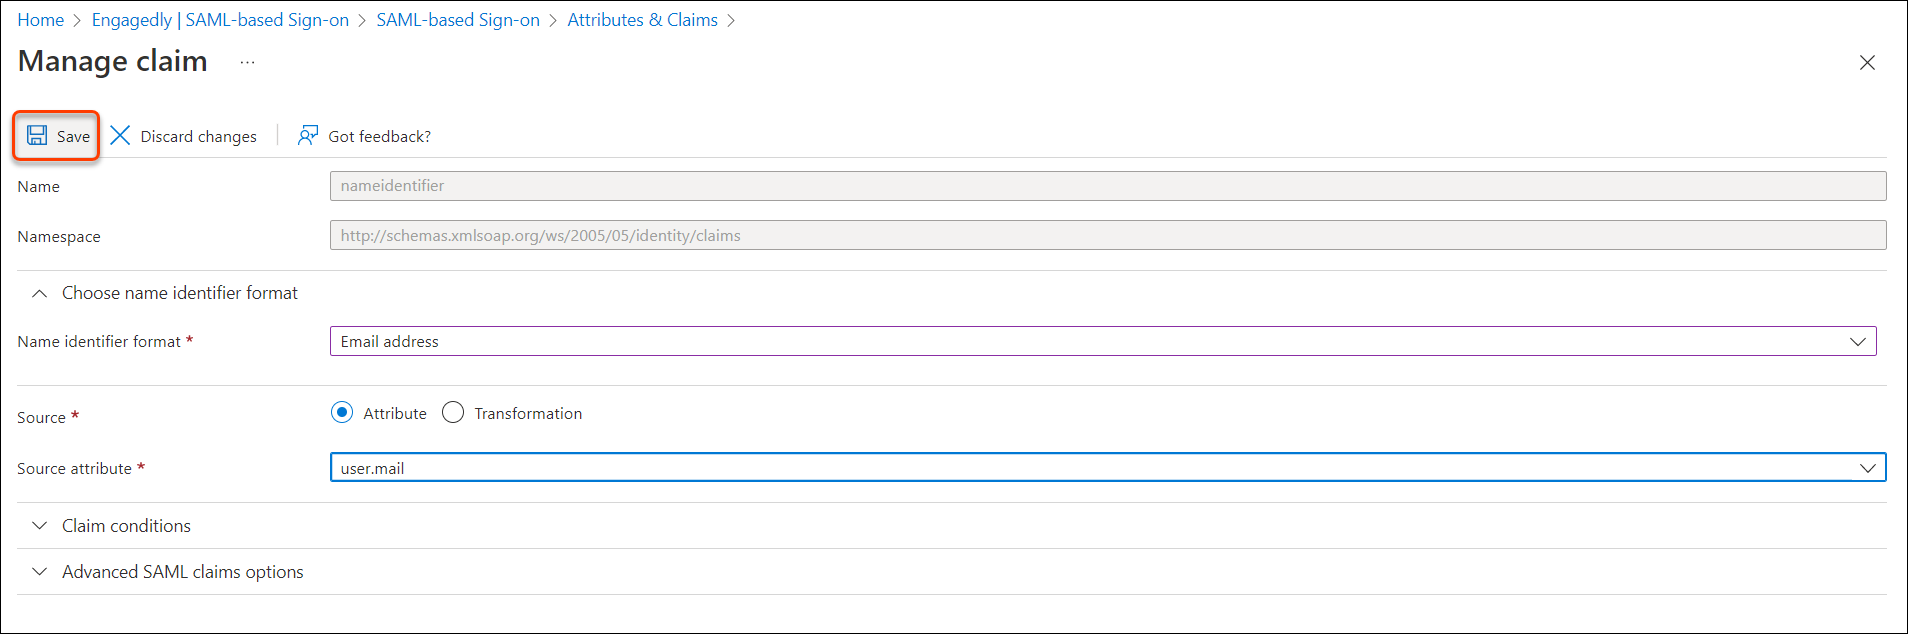
The source attribute has changed.
You have successfully integrated Azure Active Directory with Engagedly for SSO.
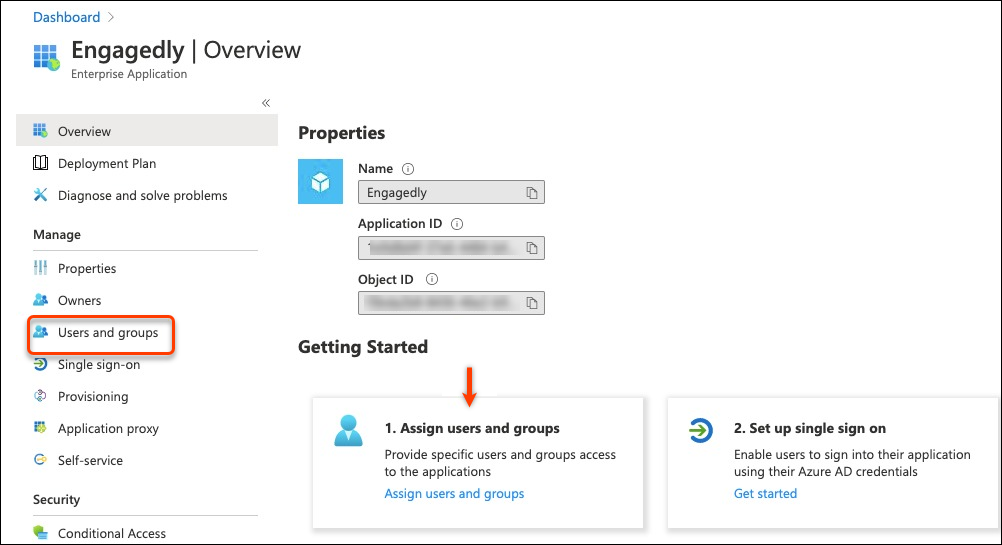
Step 20: Assign users from the Users and Groups page. To do so, go back to the Overview page in Azure and click Assign users and groups, or select the Users and groups on the left pane.
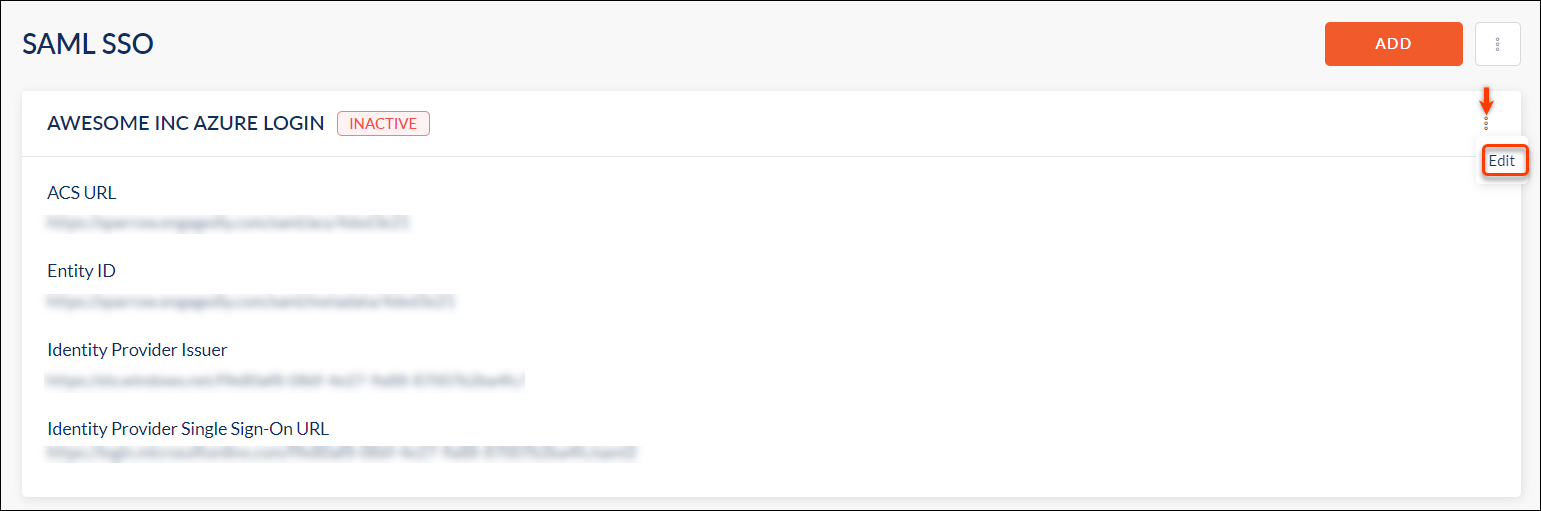
Step 21: To test SSO, go to Engagedly and click the Overflow Menu ![]() Icon and click Edit on the recently saved configuration.
Icon and click Edit on the recently saved configuration.
Step 22: Click Test Connection to test SSO. If it works, then click SAVE.
Your SSO setup is now completed. You can log out of Engagedly and try it.
Note: If you are locked out of Engagedly, reach out to support@engagedly.com.