Table of contents
1. Introduction
The Engagedly homepage serves as a command center for all key activities and updates within the platform. After understanding the basic layout and navigation elements of the homepage in the overview document, this guide takes you one step further into the powerful features that help your daily work more efficient and engaging.
This guide provides a detailed walkthrough of the interactive features available on the homepage: the Dashboard, Intranet, Tasks, and Resources. These features are thoughtfully integrated into the homepage to help you track pending actions, stay informed about organizational updates, manage daily responsibilities, and access important files.
After logging into Engagedly, you are directed to the homepage (landing page), a central location that helps you seamlessly navigate and access all features and resources. Whether you are an individual contributor, manager, or admin, understanding how to use these features effectively can significantly enhance your experience and productivity within the platform.
If you are a manager, your team members are listed below these homepage options for quick access and oversight.
2. Dashboard
On the “Dashboard”, you can access Engagedly apps that provide concise overviews, allowing you to view key information and perform important actions from the homepage without navigating into each app.
To manage the apps and celebrations that appear on your “Dashboard”:
- At the top right, click the Settings
 icon.
icon. - Select the desired applications and Celebrations you want to display, then click Update.
- Drag and drop the apps to reorder them as required.
Below your name, you can view your pending actions. Click a pending action to navigate directly to the relevant app.
Note: The availability of Celebrations and Engagedly apps on the dashboard depends on the widgets you configure.
3. Intranet
The intranet provides a centralized space to share organizational values, internal updates, resources, and announcements. It encourages effective communication, strengthens transparency, and keeps employees informed and engaged, all within the platform, making it easy to access everything you need in one place.
By default, Engagedly provides you with the organizational values in the intranet, which you can edit at any time. Only admins can add and manage sections and widgets in the intranet, while employees have view access.
Navigate to Home > Intranet.
Click Edit at the top to add sections and widgets to the intranet.

Add and manage a section
Sections help organize content within the intranet, allowing you to group related information such as announcements, resources, or updates in a clean and structured layout.
Add a section
- Click the Plus
 icon to add a section.
 - Select a layout, enter the section title (optional), and click Add.
There are multiple layouts available for each section, allowing for different content types.
Manage a section
Click the widget in a section and then click the Pen ![]() icon to edit it.
icon to edit it.
Click the Delete ![]() icon at the top right of a section to remove it.
icon at the top right of a section to remove it.
📒Note: Deleting a section removes all widgets within it.
Add and manage a widget
Widgets allow you to add dynamic and interactive content, such as banners, quick links, celebrations, or resources within each section. They make the intranet more engaging, informative, and useful for employees.
Add a widget
After adding a section, you can customize it with widgets.
- Click Add Widgets on the top right of a section.
- Select a widget and click Select.
The following widgets are available for you to add, based on your requirements:
- Banner: Select a layout, upload an image, enter the title, select the title alignment, enter the description, select a background, and click Add.
Click the Plus icon to add another banner.
- Card: Select a layout, upload an image, enter the title, select the title alignment, enter the description, select a background, enter a URL, and click Add.
When clicked, the card directs employees to the hyperlinked URL.
- Celebrations: Select between birthdays or anniversaries.
- Resources: Select the folders or files and click Add.
- Quick links: Select links from the org library or create a new link.
- Click the Settings icon to add links to the org library.
- Bulletins: Click the Plus icon to add a bulletin, enter the title and description, upload a cover image, and click Save.
After adding a bulletin, click the Overflow Menu on the right for additional options: Attach, Edit, or Delete.
 - Social: Enter the title, select the feed types, and click Add.
Manage a widget
After adding a widget, you can manage it if required.
Click a widget and click the Pen ![]() icon to edit it or the Delete
icon to edit it or the Delete ![]() icon to remove it.
icon to remove it.
📒Note: The pen icon is available only for banners, cards, resources, and social widgets.
After adding sections, widgets, and making the necessary changes to the intranet, you must publish it to make it visible to all employees.
Click Publish at the top right.
4. Tasks
The tasks section helps you stay on top of your responsibilities by organizing them by status and app.
- View all, upcoming, and completed tasks.
- View app-wise tasks for easy access.
Click an app on the left and select it to mark it as complete.
📒Note: You can mark a task as complete only after you finish it.
If you have additional roles:
- As a manager, you can view tasks assigned to your team members.
- As an admin, you can view tasks across the entire organization.
Select a team on the left to view team-specific tasks, and related tasks appear on the right.
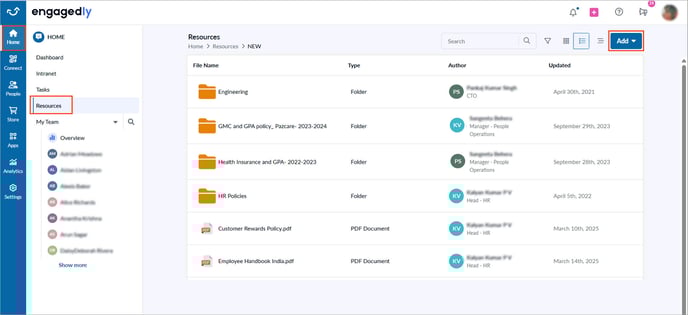
5. Resources
Only admins can add files and folders to "Resources". Adding files and folders helps them organize and share important documents with employees. This gives everyone easy access to organizational policies, guides, handbooks, and other resources at any time, all inn one place.
Add resources
Navigate to Home > Resources.
- Click Add at the top right.
2. Perform one of the following options:
- Add a file: Select File, then select the files you prefer to upload.
- Add a folder: Select Folder, enter a name, and click Create.
After creating a folder, add files to it.
💡Tips: You can add these resources to:
- The intranet to give quick access and better visibility for employees.
- Marissa, so it can provide a quick and accurate responses to employees' questions.
Manage resources
After you create a folder or add a file, you can manage it as required.
- Hover over the folder or file.
- Select one of the following options:
- Rename: Change the name of the selected file or folder.
- Move: Relocate the file or folder to another location within Resources.
- Delete: Permanently remove the selected file or folder.
- Send to Marissa: Add the file to Marissa’s training data so the HR agent can use it to answer employee questions.
📒Note: The "Send to Marissa" option is unavailable for folders and image files.