Admins can save time by bulk importing new goals or updating existing ones using a downloadable template. This is especially helpful when assigning the same goal to multiple employees or distributing multiple goals across teams, as it is time-consuming to do manually.
After importing goals, you can view their history.
💡 Tip: Admins can assign the “Manage goal import for all employees” role to any employee along with the “Manage and view goal dashboard for organization” role, allowing them to import goals.
⚠️ Warning: Any incorrect or incomplete information in the template results in import failure.
Navigate to Apps > Goals.
Add new goals
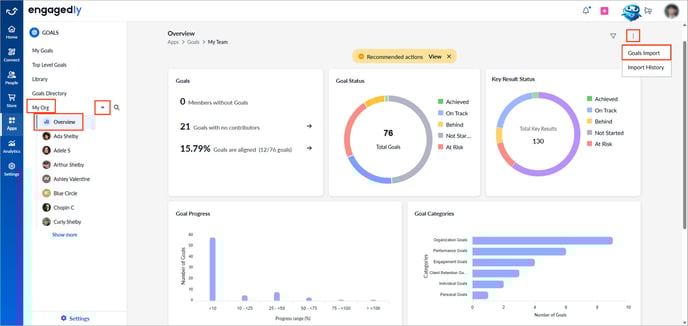
- On the left pane, open the drop-down, select My Org, and then click Overview.
- Click the Overflow
 Menu at the top right and select Goals Import.
💡 Tips:
When importing:
- Ensure the data in the template is accurate.
- Enter the goal owner's email address to assign them individual or multiple goals correctly.
3. Select Add New Goals and click the Download ![]() icon.
icon.
4. Open the downloaded file, enter the relevant information, and save the file.
5. Return to the Engagedly site, click Upload, select the template, and then click Import.
6. Click Next and then click Import.
⚠️Warning: If the template contains incorrect information, you get errors. Make the necessary changes to the template and re-upload it.
7. Enable the option to notify goal owners about the goal creation if required, and click Submit.
Update existing goals
3. Select Update Existing Goals and click Export.
4. Click the Filter ![]() icon to apply filters in different fields as required.
icon to apply filters in different fields as required.
5. Select the goals you want to update.
6. Click Preview & Export, and then click Export.
7. Open the exported file, enter the relevant information, and save the file.
8. Return to the Engagedly site, click Upload, select the template, and then click Import.
9. Click Next and then click Import.
After importing, manage goals if required. Learn more in Manage a goal.
📒 Note: Goal owners can also manage the goal.
Import history
After importing, you can view the history and details of all imported goals, including the file name, import type, uploaded by, timestamps, record counts, and status. This helps you track goal imports, identify errors, ensure accountability, and manage bulk updates efficiently.
Navigate to Apps > Goals.
- On the left pane, open the drop-down, select My Org, and then click Overview.
- Click the Overflow
 Menu at the top right and select Import History.