Table of contents
- Introduction
- Integration process
2.1. Enable Udemy in Engagedly
2.2. Add Udemy credentials
2.3. Add OAuth2 Provider details
2.4. Sync courses and progress - Configure course categories
- Import Udemy courses
1. Introduction
Udemy is an online learning platform that offers a wide variety of courses across multiple domains. It enables learners to upskill at their own pace through structured content, quizzes, and assignments.
The integration between Udemy and Engagedly enables organizations to sync Udemy courses directly into Engagedly’s Learning module. This integration allows employees to access Udemy courses within Engagedly while enabling admins to manage courses and track learner progress efficiently.
📒Note: This document covers the integration setup for both Tangerine (V2) and Indigo (V3). Screenshots are captured from Indigo (V3), so the user interface may vary slightly in Tangerine.
2. Integration process
Admins must contact our support team to enable the Udemy integration for their organization.
Prerequisites
- Active subscription to Udemy and Engagedly.
- Udemy enabled in Engagedly for your organization.
- Admin must use the same email ID for both Udemy and Engagedly.
2.1. Enable Udemy in Engagedly
After Udemy is enabled, configure the integration settings.
📒Note: Admin configuration is required before employees can access Udemy courses in Engagedly.
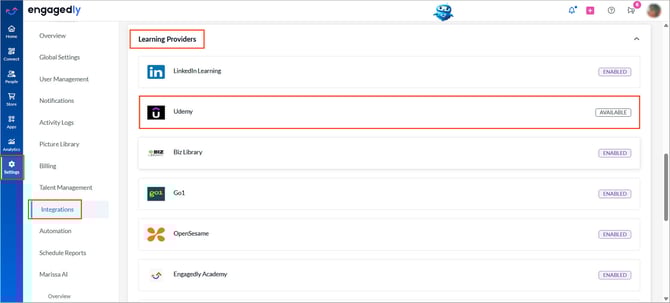
Navigate to Settings > Integrations in Engagedly.
- In the "Learning Providers" section, click Udemy.
2. Use the toggle to enable the connection and click SAVE.
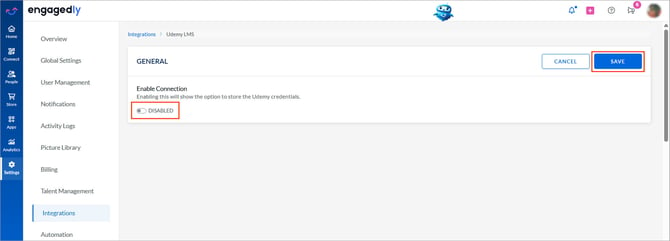
Udemy is now available to all employees in your organization.
To disconnect:
Follow the same steps to disable the toggle.
2.2. Add Udemy credentials
After saving the integration settings, add the Udemy credentials.
- Log in to Udemy.
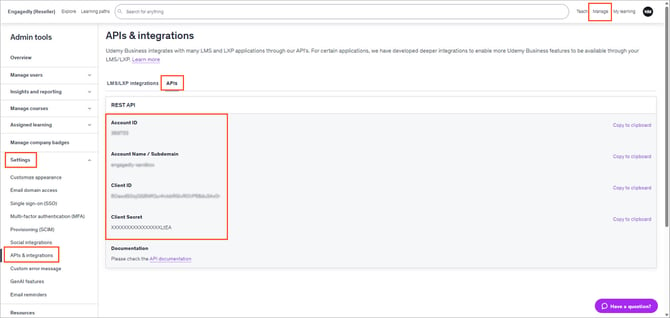
- Click Manage at the top right.
- In the left navigation menu, select Settings and then select APIs & integrations.
- Go to the APIs tab.
The Account ID, Account Name, Client ID, and Client Secret are generated.
5. Go to Engagedly.
6. Under “UDEMY CREDENTIALS”, click ADD.
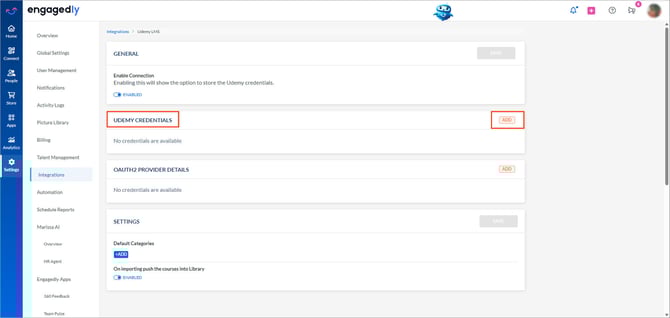
7. Paste the Account ID, Account Name, Client ID, and Client Secret into their respective fields.
8. Click SAVE.
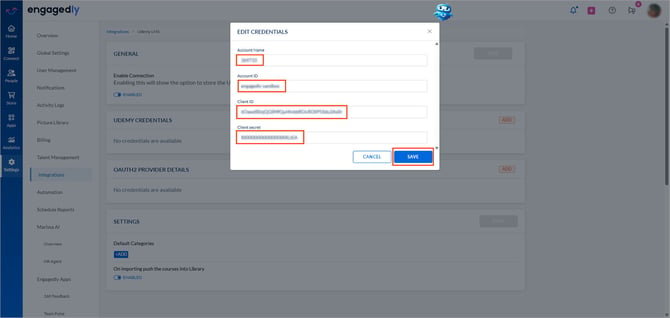
Client credentials are generated. The sync process has initiated.
📒Note: Sync does not occur if the account name and ID are incorrect.
Manage credentials
- Under “UDEMY CREDENTIALS”, click the Overflow
 Menu on the right.
 - Select Edit or Delete as required.

📒Note: If credentials are deleted, new courses do not sync, and learner progress tracking stops.
2.3. Add OAuth2 Provider details
Adding Oauth2 provider details enables real-time sync using xAPI.
Step 1: Add OAuth2 Provider in Engagedly
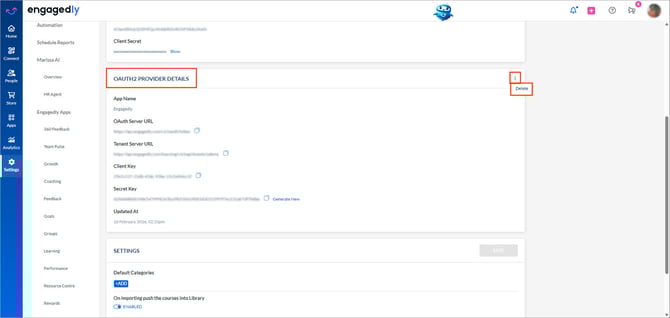
- Under “OAUTH2 PROVIDER DETAILS”, click ADD on the right.
- Enter the application name as required and click SAVE.
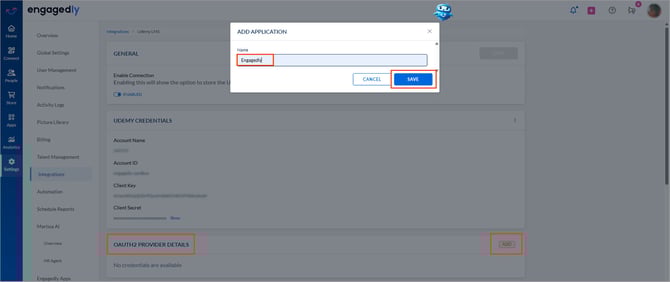
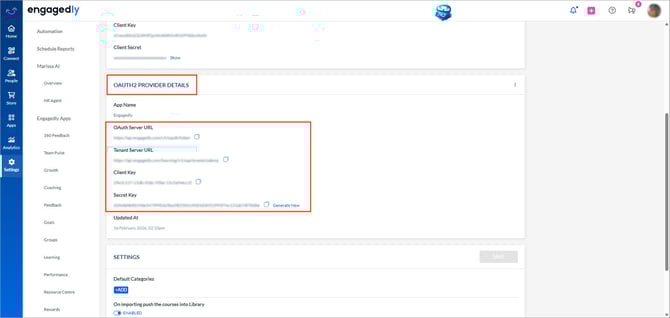
The system generates OAuth Server URL, Tenant Server URL, Client Key, and Secret Key.
Step 2: Configure xAPI in Udemy
- Return to Udemy.
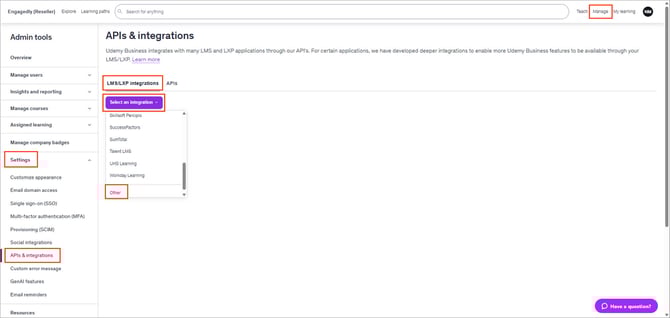
- Click Manage at the top right.
- In the left navigation menu, select Settings and then select APIs & integrations.
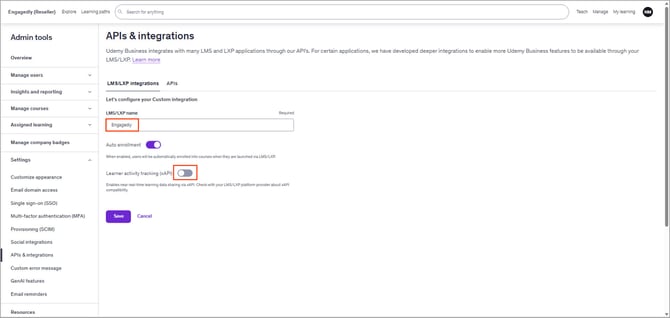
- Go to the LMS/LXP integrations tab and open the Select an integration drop-down.
- Select the required integration from the list, or select Other.
6. Enter the integration name.
By default, the system enables “Auto enrollment” and automatically enrolls learners in courses when they launch through LMS/LXP.
7. Use the toggle to enable Learner activity tracking (xAPI).
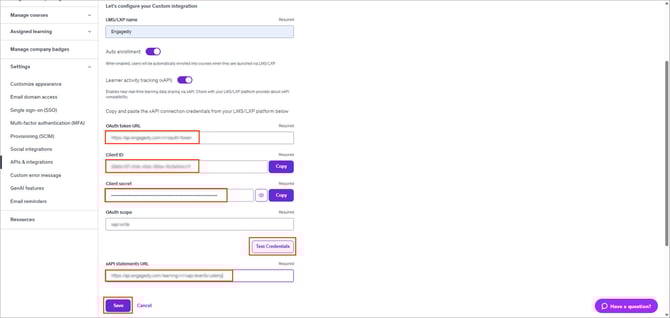
8. Under “OAUTH2 PROVIDER DETAILS”, copy the following values from Engagedly and paste them into the corresponding fields in Udemy:
| Engagedly field | Udemy field |
| OAuth Server URL | OAuth token URL |
| Tenant Server URL | xAPI statements URL |
| Client Key | Client ID |
| Secret Key | Client secret |
“OAuth scope” is autogenerated.
9. (Optional) Click Test Credentials.
Credentials are validated successfully.
10. Click Save.
LMS integration is now enabled.
Delete OAuth2 Provider details
- In the “OAUTH2 PROVIDER DETAILS” section, click the Overflow Menu on the right.
- Select Delete.
📒Note: Deleting the Oauth2 provider details stops the real-time sync.
2.4. Sync courses and progress
You can manually sync courses and learner progress from the learning provider into Engagedly. You can also recover historical learning data.
💡Tip: Ensure that the employee’s email in Engagedly matches the email in the external provider for successful data sync.
Sync history displays details of each sync, including who triggered it, when it was triggered, and its completion status. This helps maintain transparency and auditability.
You may use manual sync in the following scenarios:
- New courses were added in Udemy
- Course updates are not reflected in Engagedly
- Learner progress needs immediate updating
- Troubleshooting sync issues
Sync courses
This option allows you to fetch the latest courses from the provider so new or updated courses are available for import in Engagedly.
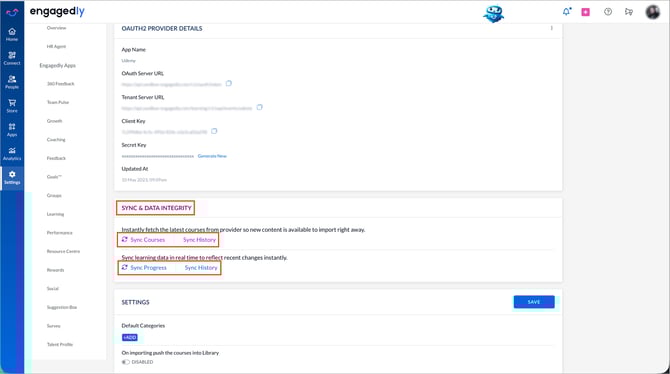
Under “SYNC & DATA INTEGRITY”, do one of the following:
- Click Sync Courses to sync the latest courses.
- Click Sync History to view the history of course sync activities.
Sync progress
This option allows you to sync learner progress data so recent course activity and completion data are updated in Engagedly.
Under “SYNC & DATA INTEGRITY”, do one of the following:
- Click Sync Progress to sync learner progress.
- Click Sync History to view the history of progress sync activities.
📒Note: The sync status may appear as “Failed” if there are connectivity issues, API failures, or if the credentials are not configured correctly.
3. Configure course categories
After integration, you can categorize imported courses in Engagedly. This step is optional but recommended.
- Click +ADD under “SETTINGS”.
- Select the required categories and click SELECT.
- Click the Settings
 icon to create a new category if required.
 - Use the toggle to push imported courses into the Engagedly library.
- Click SAVE.
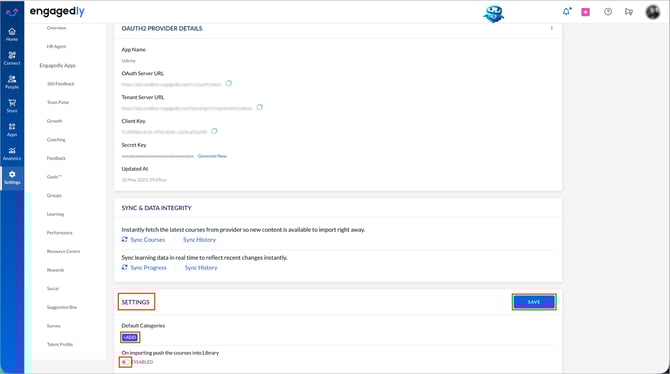
📒Note: If categories are not added, imported courses appear as “Uncategorized”.
4. Import Udemy courses
After completing the integration, import Udemy courses into Engagedly. Learn more in Import courses from integrated learning applications.
📒Note: Only admins and learning managers can import courses.
When a learner starts a Udemy course that is not imported into Engagedly:
- Course details and progress sync automatically.
- The course appears in the learner's “My Learning” tab.
- If configured, the course is pushed to the Engagedly Library.
- Otherwise, only admins and those with manage permissions can view it under the “Author” tab.
📒Note: In Tangerine (V2), it appears on the "Manage Resources" page.
After integration, learners access Udemy courses directly within Engagedly, and you can efficiently manage, categorize, and track learning progress.
ℹ️Additional information:
Udemy unenrollment sync
The system runs a monthly CRON job to check for employees who have unenrolled from Udemy courses.
If an employee unenrolls from a course in Udemy, the system automatically removes the corresponding training record from Engagedly. This ensures that training data in Engagedly stays accurate and up to date.